
Clover Configurator
Clover Configurator is the macOS-based app that lets you create and edit config.plists for your Hackintosh. The Clover Cloud Editor demonstrated in an earlier section is a Cloud-based version of Clover Configurator, but Clover Configurator gives you more control.
To download Clover Configurator, go to https://mackie100projects.altervista.org/download-clover-configurator/. Drag and drop it in the Applications folder, then open it:
To download Clover Configurator, go to https://mackie100projects.altervista.org/download-clover-configurator/. Drag and drop it in the Applications folder, then open it:
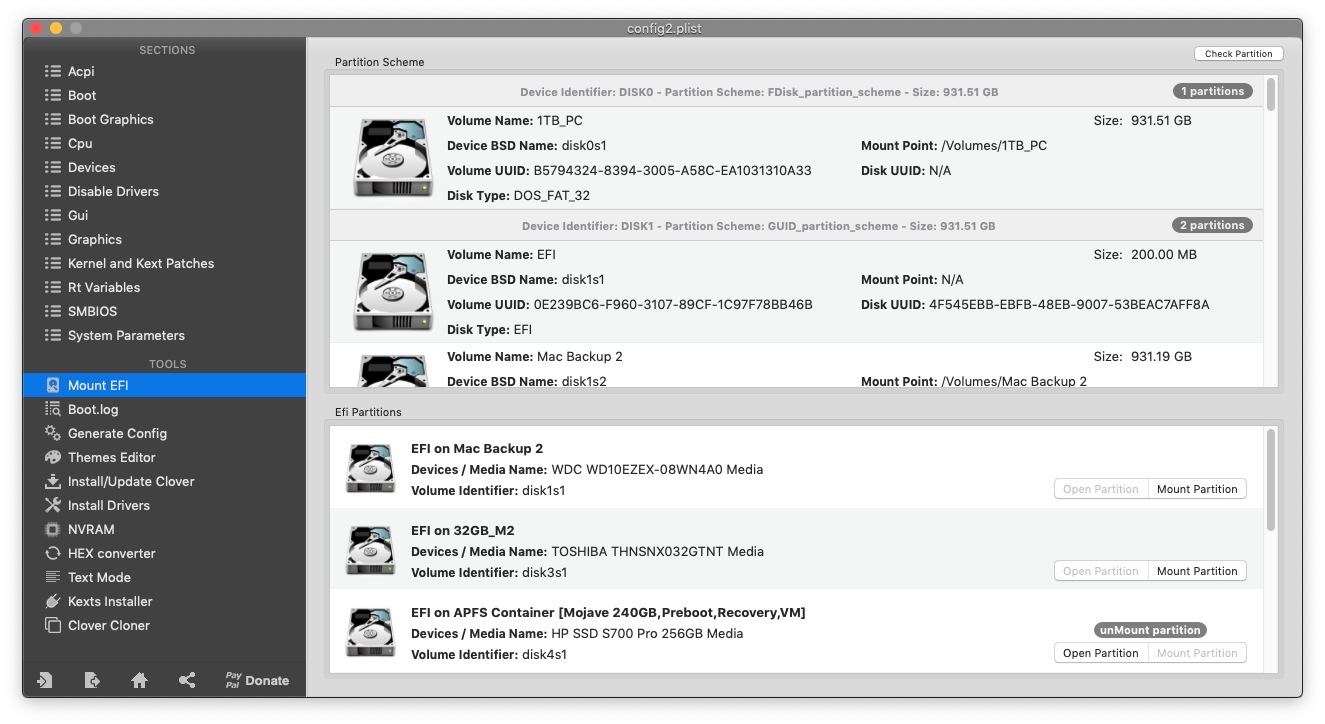
You can click an entry in the left pane and the contents will be displayed in the right pane. By default, nothing is shown. If not already visible you can reference the steps in the previous chapter to mount the EFI folder.
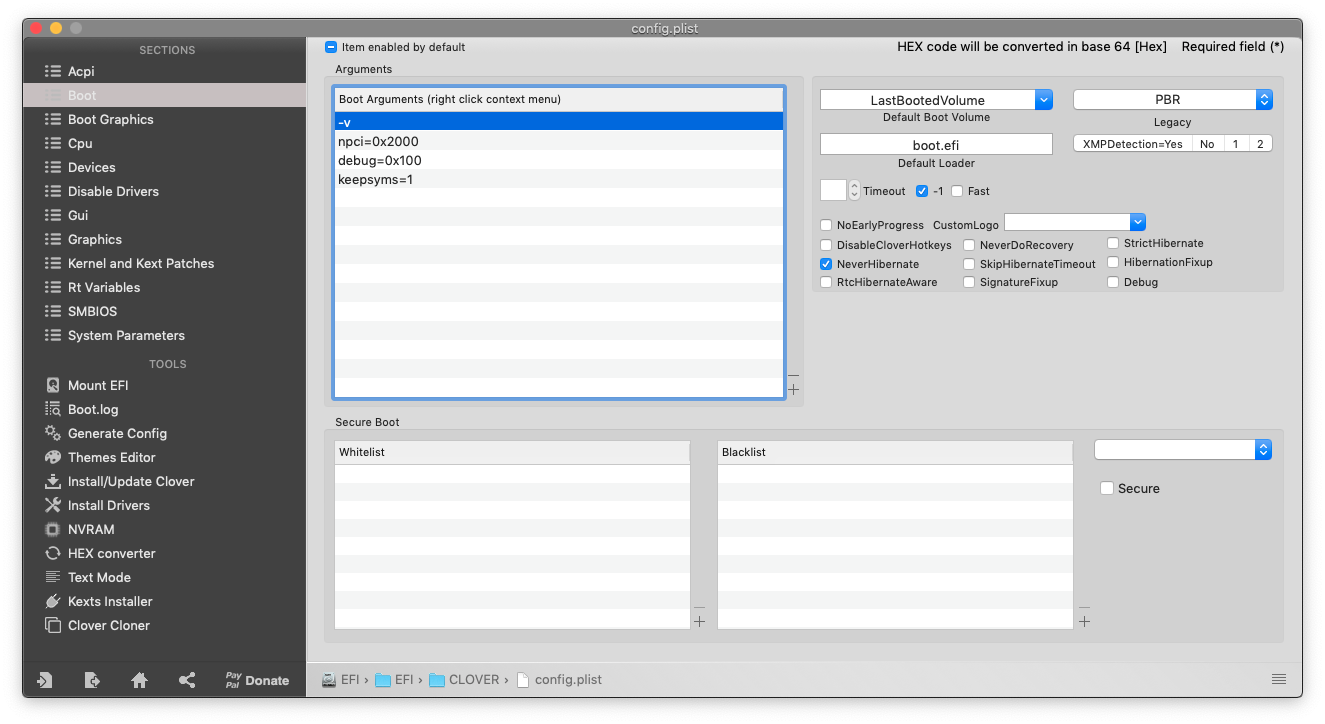
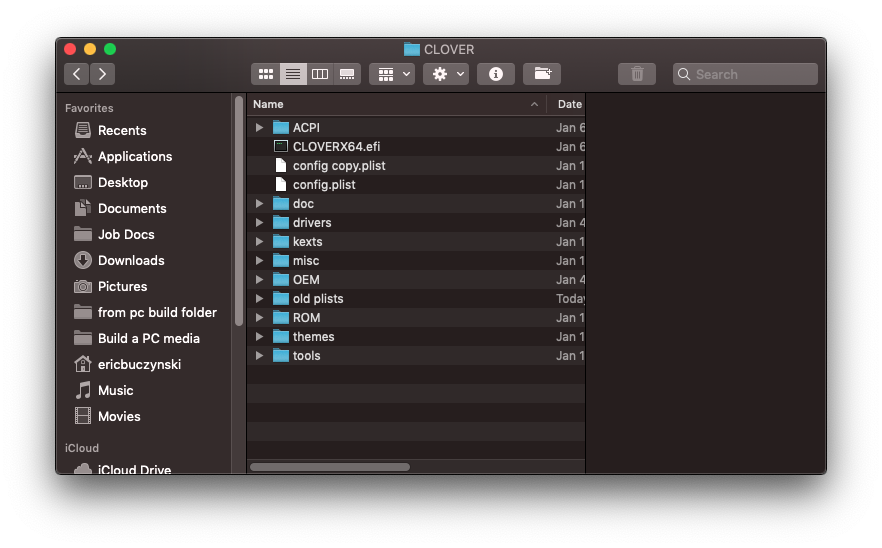
Go into EFI --> EFI --> Clover and open the config.plist file. While yours will differ, this is what I get from my Ryzentosh's results:

You'll notice an array of checkboxes and empty fields. You won't have to randomly click entries and reboot to see what works because there are guides to assist you based on your chipset. Two guides I find indispensable are the Hackintosh Vanilla Desktop Guide for Intel-based boards and the AMD Vanilla OS X Guide for AMD-based boards, covered in the second half of Chapter 8 - Clover Files & Kexts.
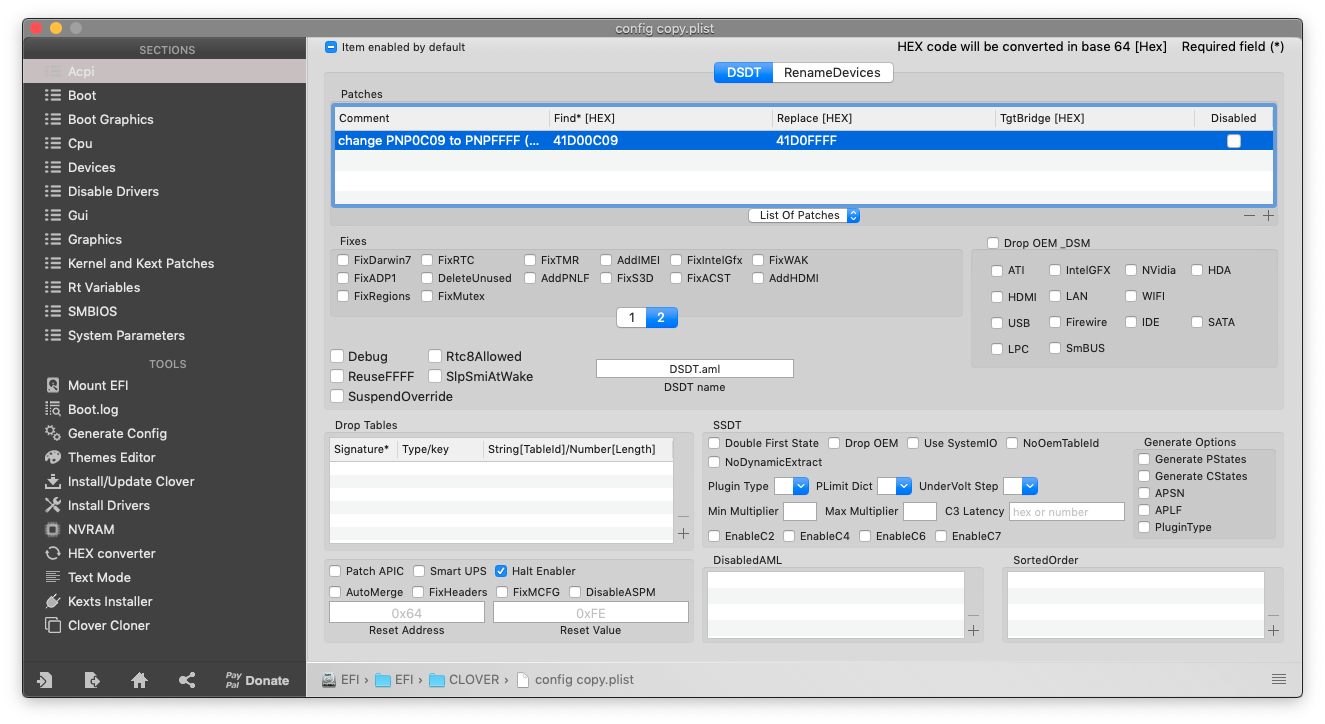
There's the section for fixes, between the "List of Patches" drop box and the "1" and "2" buttons; Click the "2" button and you'll see more checkboxes in the Fixes section:
There's the section for fixes, between the "List of Patches" drop box and the "1" and "2" buttons; Click the "2" button and you'll see more checkboxes in the Fixes section:
Some screens will have a similar setup. Others have drop-down lists where you can select the entry or entries from the list and the code will populate in the correlating list.
CLOVER CONFIG.PLIST INFO
When getting pre-built configurations for my AMD system, each configuration was named by the processor or board type, such as "Ryzen2600.plist" or "B450.plist". I eagerly copied these to my EFI/CLOVER folder so that I would have an assortment to test out. But I noticed that when I would boot my machine and get into Clover, I would go to Options, go to Configurations", and the only entry in the list would be the "config.plist" file. I had to hook up the flash drive to another machine to confirm those extra entries were still there, which they were.
My solution was to rename the extra entries so that they started with "config" before the ".plist" extension, and that fixed it. If you do something similar you can still give descriptive names such as "config_gfxtest1.plist", "config_1.plist", "config1.plist" (previous example minus the underscore), and more. Basically as long as the entry starts with "config" then it should be visible when you select other configurations.
PROGRESSING WITH CONFIG.PLIST FILES
After installing Clover Configurator, you'll probably want to begin with a new config.plist file or edit the existing one to remove commented lines of code and such. Alternatively, your system may boot with a working config.plist, but you may want to experiment and see what you can remove or add in order to speed up the process. The safe way to do this is by organizing those config.plist files.
Let's take the default config.plist file by clicking it once to select it. Press Command + C to copy and Command + V to paste:
Note: On an Apple keyboard the keys directly on the sides of the spacebar are Command keys, but on a Windows keyboard these are Alt keys. The steps to remap the keys explained earlier. If you're using a standard Windows keyboard and haven't yet mapped the correct keys, use the Windows key between the Ctrl and Alt keys along with C to copy and V to paste.
Now the copy appears as "config copy.plist". I prefer to keep filenames without spaces, but you should be able to leave yours as-is without problems. Now you can either "config copy.plist" to distinguish it from the primary .plist if desired. Open it by double-clicking the file and launch Clover Configurator for a graphical environment; or right-click the file, select "Open with...", then select TextEdit to use the text editor to edit the file. Be sure to save it when completed.
Now reboot your machine, but when in Clover go to Options --> Configs, and select the copy that you just finished editing, and continue booting. Did it fix the problem or cause the machine to boot faster? If not, then try editing the copy again. If it did, then great! What you can do is rename the original config.plist to something like "config-orig.plist" or "config-work1.plist", something memorable to remind you that it's the original file that was working properly. Then take the "config copy.plist" and simply name it to "config.plist" which is the default file that Clover looks for when you select a MacOS drive. When you boot your machine, select the MacOS drive and press enter, it will look for and load the config.plist file. If for some reason you attempt it again and it doesn't load, when in Clover you'll just go to Options --> Configurations, and select the config_orig.plist file or whatever you named the original working file.
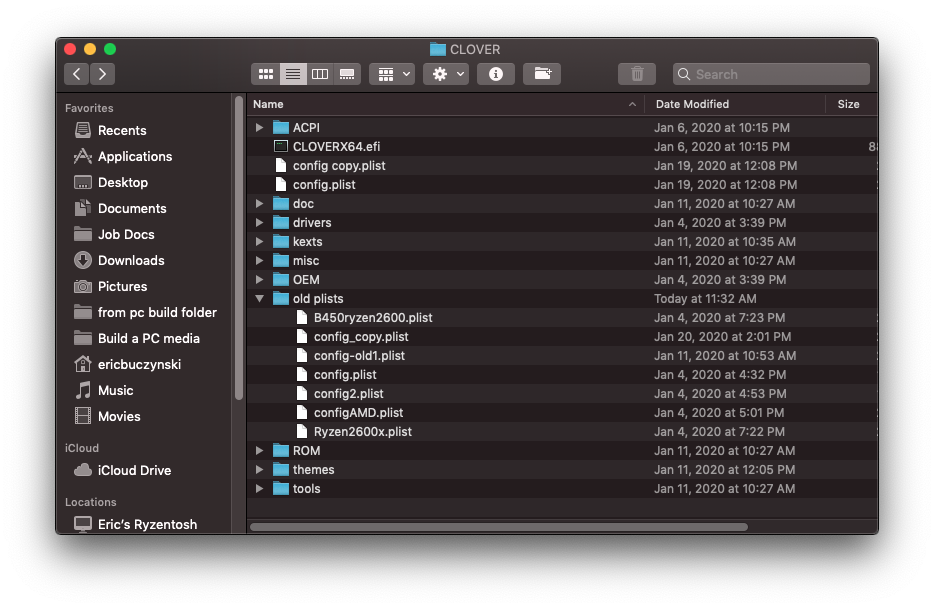
In the above screenshot I have the copy shown along with the original config.plist. In the same shot I have folders listed including one that I created myself; "old plists". Here I have previous attempts that may or may not have worked which I keep them there in case I made a major change, but realized something small broke it. You can move or copy any config.plist file to a folder for unused .plist files, but it's crucial to note that you cannot access any file including .plist files outside of the Clover folder (shown). When you boot your machine and go into Clover --> Options --> Configurations, only the .plist files that begin with "config" will be shown. In the above example, only "config copy.plist" and "config.plist" would be shown for the choices. The files "B450ryzen2600.plist" and "Ryzen2600x.plist" would not be visible as choices if listed outside of the "old plists" folder, nor could the "old plists" folder be seen and selected after having booted your machine, going into Options --> Configurations, and seeing any available .plists files.
So to ensure that you have a way in to MacOS, always have a working config.plist file in the Clover folder.
So to ensure that you have a way in to MacOS, always have a working config.plist file in the Clover folder.
LABELING EFI DRIVES
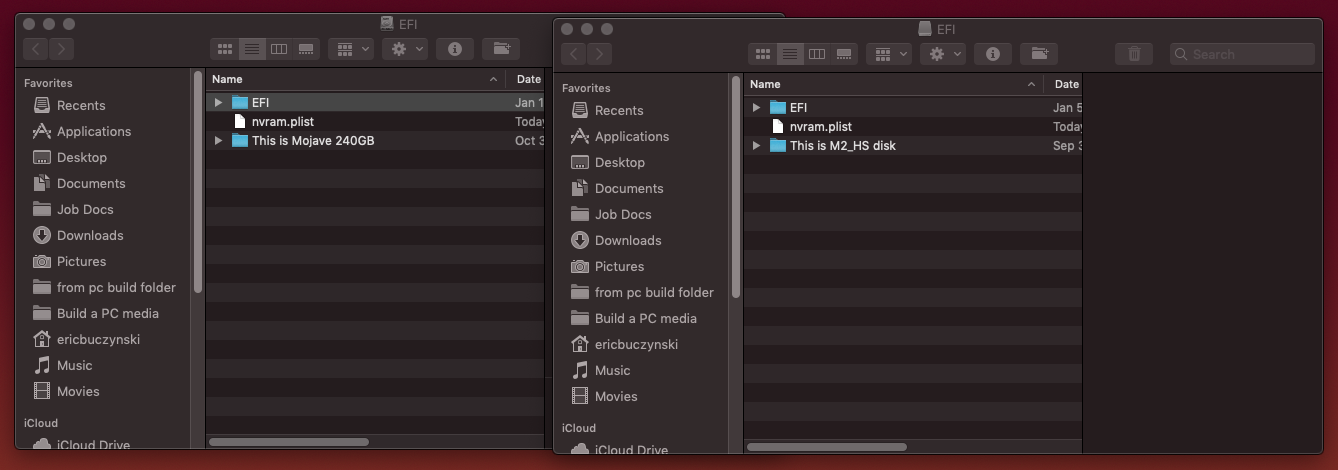
When I was getting familiarized with Clover, there were times when I would have more than one MacOS disk available. This was typically my working internal drive and my MacOS installation flash drive. Both drives had an EFI folder that I wanted to work in, but how could I quickly distinguish them from each other? The solution was simply adding a folder from the root to tell me which was which.
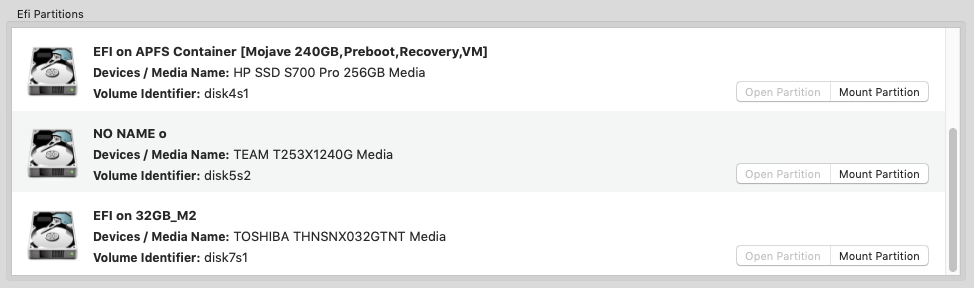
First I went into Clover Configurator, and for each MacOS volume I clicked the Mount Partition button:
When I was getting familiarized with Clover, there were times when I would have more than one MacOS disk available. This was typically my working internal drive and my MacOS installation flash drive. Both drives had an EFI folder that I wanted to work in, but how could I quickly distinguish them from each other? The solution was simply adding a folder from the root to tell me which was which.
First I went into Clover Configurator, and for each MacOS volume I clicked the Mount Partition button:
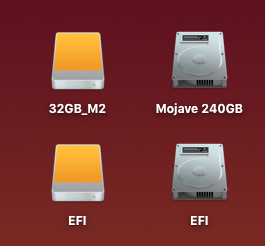
As expected, these appeared on the desktop like so. The 32GB_M2 drive is on a PCIe card and mounted internally, but because of the setup it has the external drive icon:
From there I just double-clicked each EFI volume to open them, then created a folder for each one with the appropriate name:
Now the process of file exploring each drive was easier and safer with that simple label. Having the empty folder won't interfere with any process nor will it affect boot times on either drive.
