
Chapter 6
Clover and MacOS via Windows (Mac Optional)
Years ago you had to have access to a Mac or know someone with a Mac so that you could download the operating system itself. But now it's now easier than ever to get macOS via Windows thanks to the community and hobbyists. While this chapter is for Windows users, Mac users can follow these steps to get macOS and Clover put on a flash drive if they choose to do so. Otherwise the steps for prepping the flash drive on an existing Mac are in the next chapter.
For this section you'll need to download a few packages to get started; all free, no shareware:
For this section you'll need to download a few packages to get started; all free, no shareware:
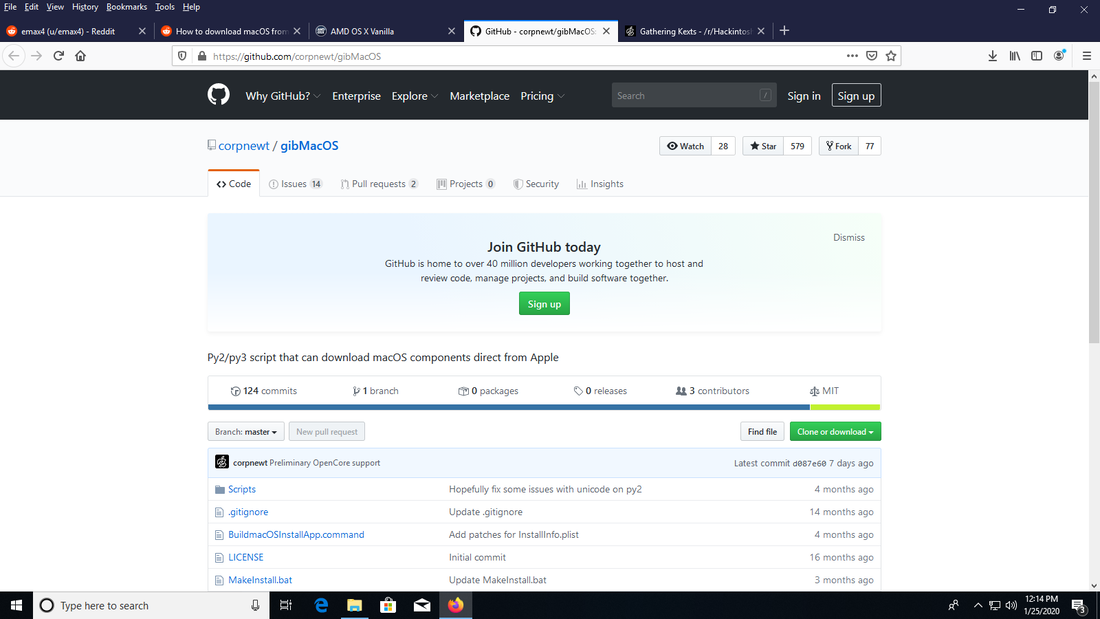
- GibMacOS (https://github.com/corpnewt/gibMacOS) - Will be used to download MacOS and create the installer for the flash drive.
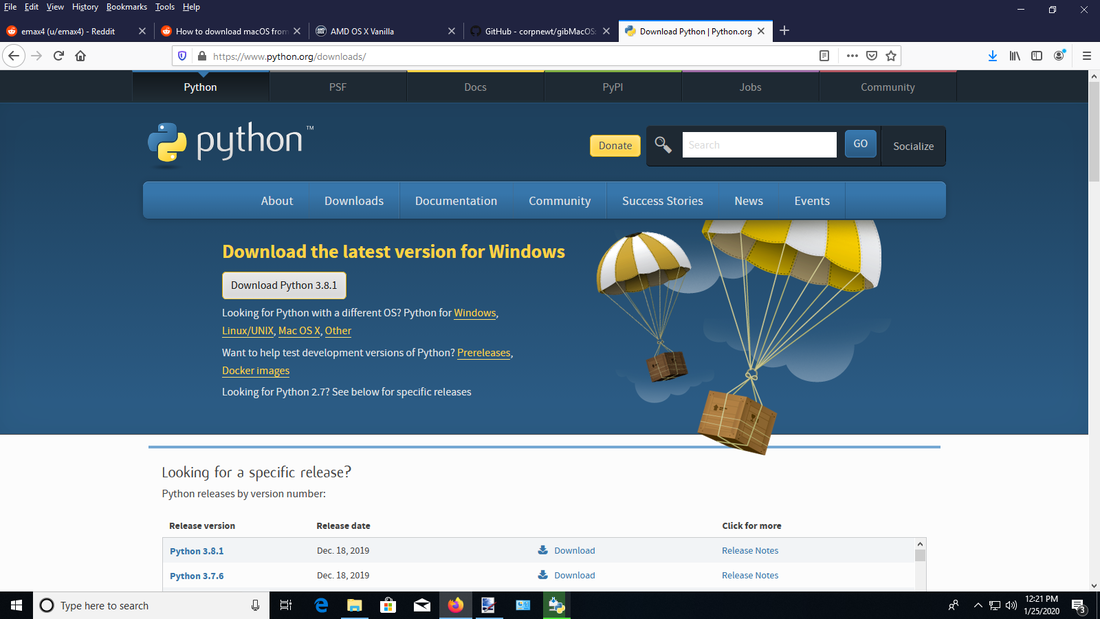
- Python (https://www.python.org/downloads/) - A free scripting program used for the GibMacOS scripts
Click the link for the GibMacOS software. On the right side of the page there is a green button, "Clone or Download". Click this and select "Save as .zip", then unzip it to your downloads folder or a different hard drive location you prefer.
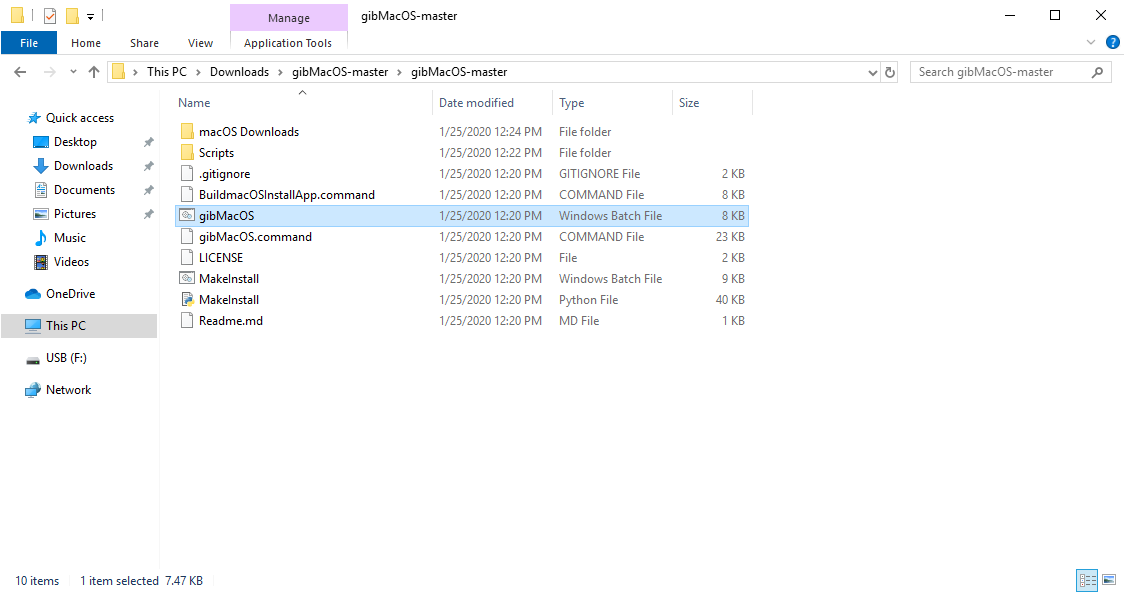
When unzipped it will appear similar to the window below. The folder macOS Downloads won't appear yet until you actually begin the process of doing that. The two items you'll be using a bit later are gibMacOS and MakeInstall.
Now click the link for Python and download the .exe package that installs it. It will be a direct .exe package instead of a zipped download. Run the .exe installation package, and near the end of the installation process, click the option for allowing a path.
When you run any programs for the process such as installing Python, right-click each one and select "Run as Administrator". You may get a pop-up warning such as the one below:
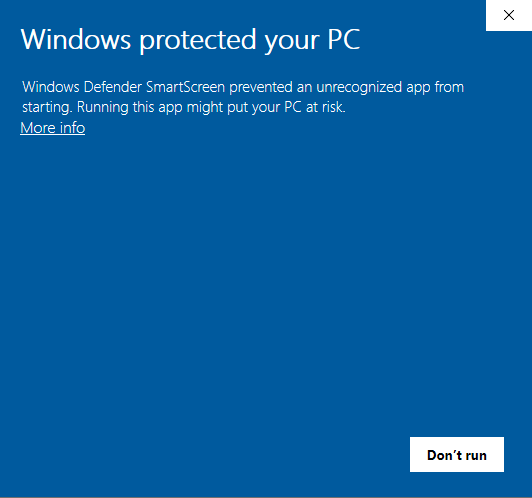
To allow this, click on the "More Info" link in the window, then click on "Run Anyway". Return back to the gibMacOS screen and double-click the gibMacOS Windows Batch File, highlighted in the 3rd previous screenshot. Now you'll see a list of entries in the terminal:
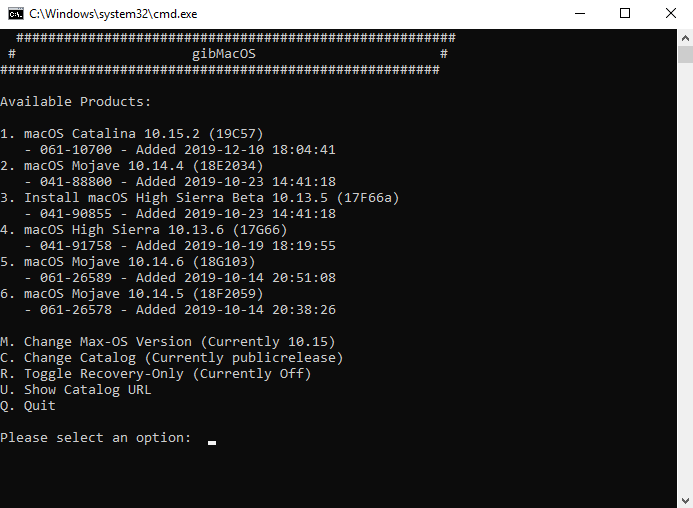
The current version shown is macOS Catalina 10.15.2 (19C57). Choose the latest version first if you think it'll run on your system. You can download others as well, but note that each download is more than 5 GB in size and will take some time, depending on your internet speeds.
Note the options below the OS versions including the option for Recovery. When you type "r" and pres Enter, more options will be shown. The Recovery versions were important when I was attempting to install Catalina on my AMD Ryzen-based system. After so many attempts I could not get it to work but was able to install Mojave successfully using the Recovery method.
Note the options below the OS versions including the option for Recovery. When you type "r" and pres Enter, more options will be shown. The Recovery versions were important when I was attempting to install Catalina on my AMD Ryzen-based system. After so many attempts I could not get it to work but was able to install Mojave successfully using the Recovery method.
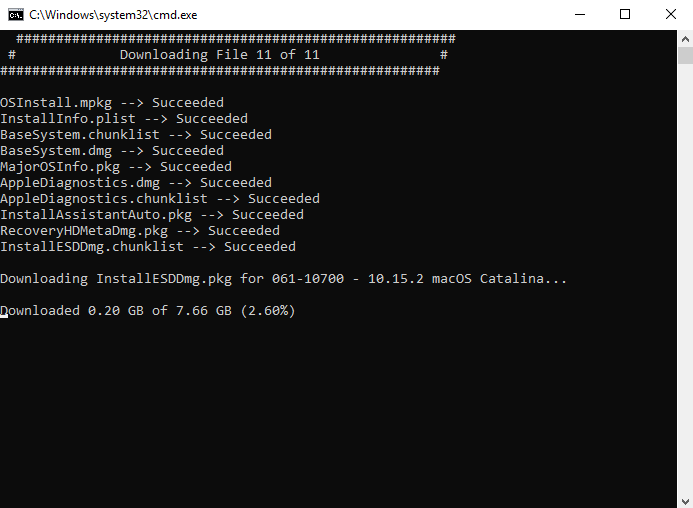
When you start downloading the OS, the progress for each item is listed along with time remaining for larger downloads. When completed, the OS will be in the gibMacOS folder under macOS downloads --> publicrelease. If you download another version only the opposite type of the previous download, such as downloading the store version after you've finished downloading the full version, you'll get a warning that the download already exists. Typically you shouldn't need to download each type, but I was having issues when installing Catalina on my AMD system and wanted to try Full Install and Recovery Installations for Catalina and Mojave versions. For this I created folders "Catalina FULL", "Catalina RECOVERY", "Mojave FULL", and "Mojave RECOVERY"; and after each download I simply moved it to the appropriate folder.
When the download is finished you can press return, then Q and return to quit the program.
At this point you'll want to take your 16 GB or greater flash drive and connect it to your PC if you haven't done so already. Reformat it if needed as well. Return back to the gibMacOS folder and double-click the MakeInstall Windows Batch File. This program will install the Clover base bootloader and the previously downloaded operating system to the connected flash drive.
In my example below I plugged in a 16 GB SanDisk flash drive (entry #3) while the app shows my two installed hard drives, a Kingston 240GB drive (entry #0) and a LITEON 24 GB drive (entry #1). The reason there's no entry #2 is probably because it's the Windows drive the program is currently being used on, which can't be formatted because it's in use.
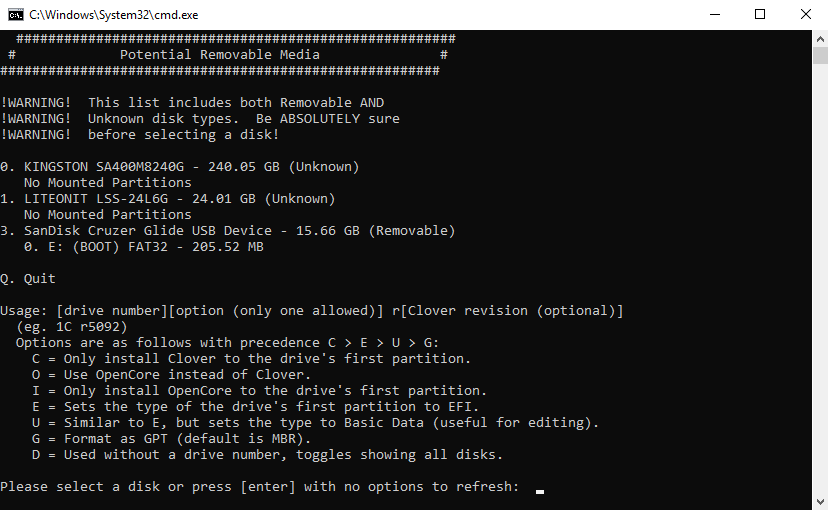
The bottom section shows various options when setting up the flash drive, but above the options there's a usage example to make note of. If you simply select your flash drive and press enter, it will erase the drive and install Clover and the downloaded OS to the selected flash drive. What I suggest is following the usage example, sort of.
In later versions of Clover, it appears that an Internet connection was required when installing MacOS. Versions prior to r5092 of Clover did not require this, and when testing out various methods on my own and prior to that, I have confirmed this limitation still exists. Because of this odd restriction I suggest typing in the number your flash drive corresponds to in the list followed by a space and r5092. so if your flash drive in the list was listed as #4, you would type in:
In later versions of Clover, it appears that an Internet connection was required when installing MacOS. Versions prior to r5092 of Clover did not require this, and when testing out various methods on my own and prior to that, I have confirmed this limitation still exists. Because of this odd restriction I suggest typing in the number your flash drive corresponds to in the list followed by a space and r5092. so if your flash drive in the list was listed as #4, you would type in:
4 r5092and press Enter. Your next screen will be a confirmation request:
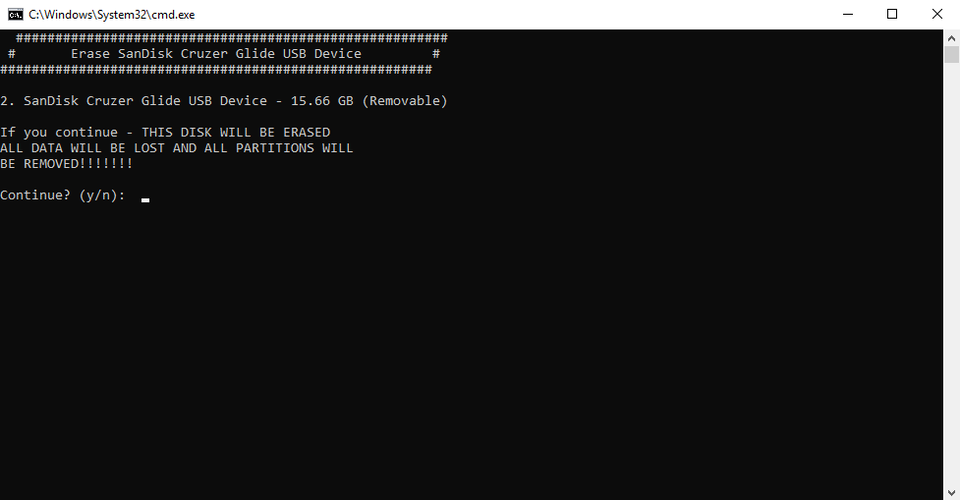
I've had flash drives that worked before but sometimes would not be recognized. If it doesn't work initially, try a few more times. If you still have no luck, reformat the flash drive and try again. When it's finished installing a few things will happen:
- You may hear the icon that plays when a flash drive is inserted, and you may see prompts on the screen asking what to do with the drive. Close these notifications. If you go to Windows Explorer, you'll see a new entry on the left side with the drive letter and the name "BOOT". You can click this and dive further to see how the system is set up, as we'll be moving and modifying files shortly.
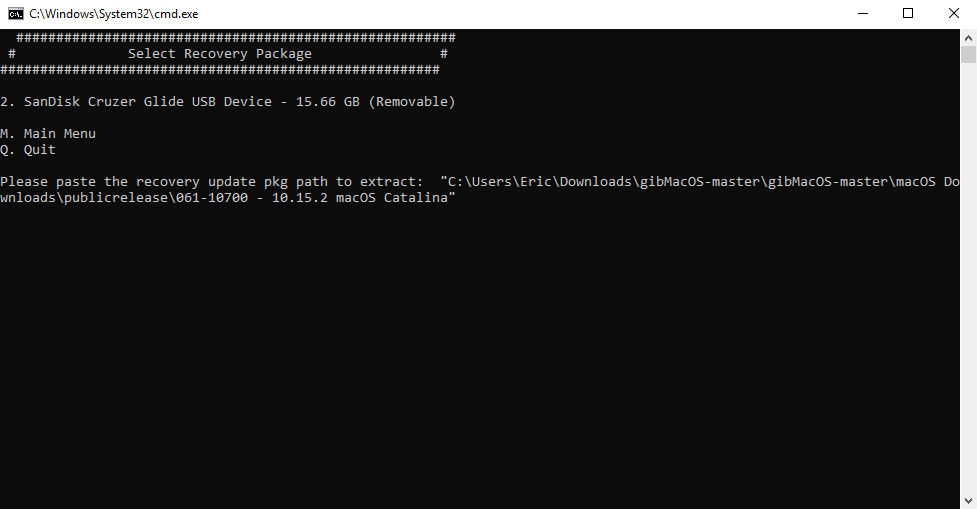
At this point, the app will have formatted the flash drive into two partitions: one for booting and one for the installer. The Boot section is accessible, but the installation section is invisible as it is in a Mac format. This is why you may get a prompt saying that the second part of the flash drive is problematic. Ignore this message. When this process is done in MacOS, the visibility is reversed. That is, the EFI partition is hidden until you use a program like clover Configurator or the terminal to expose it, while the OS installation files are visible and accessible. - Clover it will ask you for the path where the MacOS files exist:

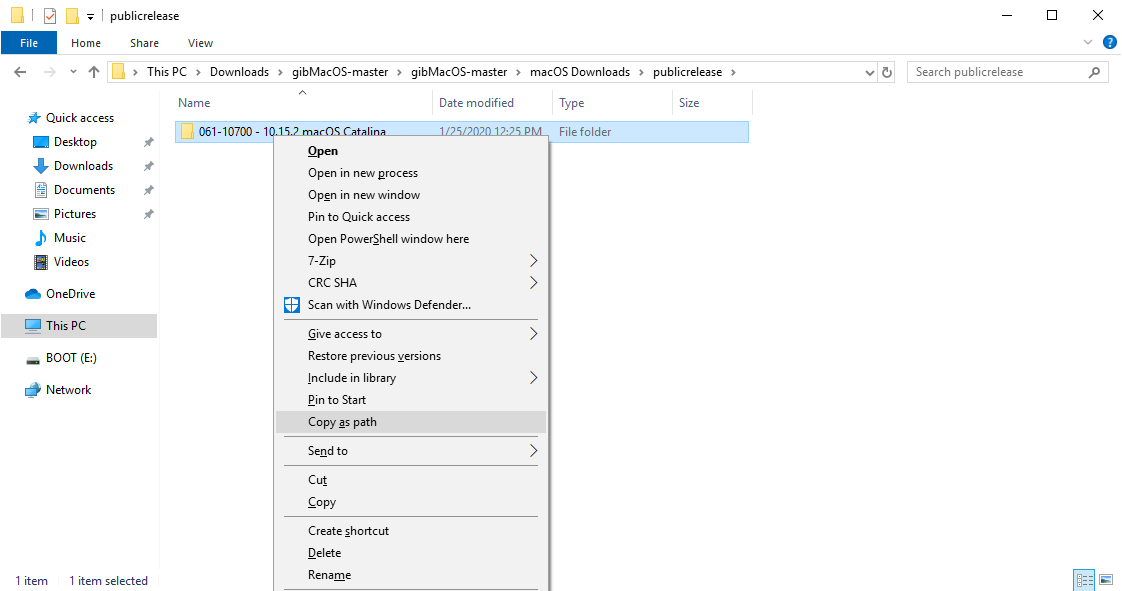
Here you'll need to navigate to where you downloaded the MacOS in an earlier step. In the example below the path shows This PC --> Downloads --> gibMacOS-master --> gibMacOS-master --> macOS Downloads --> publicrelease. In order to copy this path, hold down CONTROL and SHIFT on the keyboard together, and as these keys are held down, right-click the mouse on the folder to get the contextual menu (below), then click on "Copy as Path" (highlighted in the menu in the example below):
Return back to the MakeInstall command window, then simply right-click at the prompt where it will automatically paste that path for you, shown in the example below:
Press Enter or Return to begin the process, which typically takes 10 minutes or so. The window will say "This may take some time..." When it has finished you can press Q and Enter to quit, then move on to preparing the files for Clover.
