
Chapter 5 Changes
Below the Disk Selection screenshot:
Note: I have two internal, solid state hard drives, both are PNY XLR8 120 GB drives. While I can distinguish them by the “Win” and “Mac” labels I stuck to the back of each drive, the system shows them as two versions in P0 as SSD2SC120G3LC726B104-370P, and P1 as SSD2SC120G3LA726B087-370P. This is the main reason why it's important to detach SATA power cables from any drives you will not be using, as you may not know which drive will be the one for OS X (especially if you have the exact models also being used as the above example shows). The entry highlighted above is the SanDisk Cruzer Glide 1.27, which is a USB flash drive. Your screen may appear different in the boot selection screen.
Please note that (at least with Gigabyte boards) some disks are shown but not all disks may be shown. For example, I have my system to load both UEFI disks for OS X and legacy disks for Windows. In the disk selection screen above, I may have the AOSO Optiarc DVD drive highlighted. If I press the down arrow twice and it jumps to the top highlighting the PO:SSD...104-370P, I know that all the disks are shown. However, if I start from the DVD selection then press the down arrow twice and nothing is highlighted, I know more disks are available but are not visible. Sometimes this can be a trial-and-error issue. For quicker results, only select the UEFI options only from the BIOS/UEFI screens instead of both UEFI and Legacy. When you install your Windows drive, then you can go back into the BIOS or UEFI and experiment with both UEFI and legacy.
Select your boot device with OS X and press Enter. This will take you to the Clover screen:
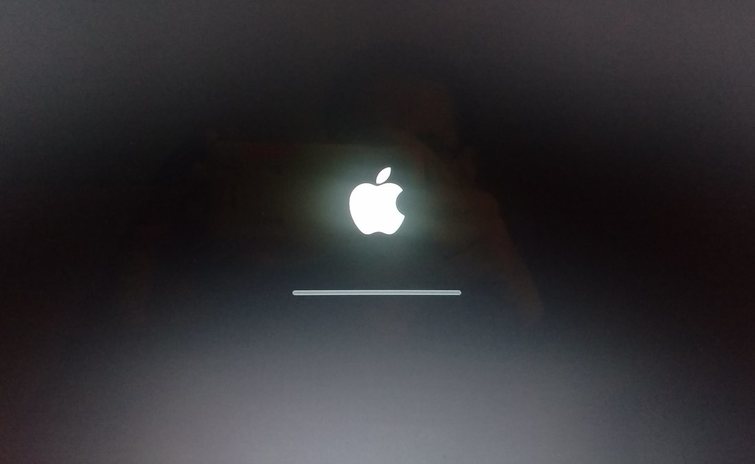
If you want to test the default values and try to reach the installer splash page, select the same boot drive to install OS X then press Enter. What you should see is a black screen with the white Apple logo in the center and a progress bar underneath of the logo. The first time it boots it will take 1-3 minutes (with a USB 3.0 flash drive) or slightly longer to reach the splash page. The splash page is a language selection screen with the words “Welcome” in various languages scrolling from right to left (explained later). If you're lucky you'll reach it on the first try, skip ahead to “The Welcome Screen”. Otherwise you may need to use boot flags or change settings first like the rest of us.
Boot Flags and setting the SMBIOS
While the flash drive has the OS X installer on it, you may need to use flags and make changes to Clover from the start to reach the installer if you get errors. The error or output that you get will help to determine what needs to be done. Does the system reboot part way when the progress bar is loading? Then you may need to go back into the BIOS/UEFI and ensure the Legacy/UEFI settings are in the correct order. Does the progress bar complete and take you to a black screen? You may need to check the video settings. Does the system freeze at some point when the progress bar is moving? You'll need to get more info by using the flag -v. In some cases (some. Don't hold it against me), the fix may be simple, starting with the SMBIOS.
The SMBIOS is an identifier that helps OS X work better with the hardware. For example, a desktop Hackintosh wouldn't use an identifier of a Mac Book Pro (laptop), but instead would use perhaps a Mac Pro or an iMac identifier. The SMBIOS is labeled with the name of the model, followed by a digit or two separated by a comma. There are different models with different features, and getting the right model is a crucial step in getting OS X to run on your hardware. So how do you know which SMBIOS to use?
The easiest way is to do a Google search with “SMBIOS hackintosh” and either the make and model of your laptop or your processor type. The second-easiest method for finding the SMBIOS is to head over to www.everymac.com/systems/by_capability/mac-specs-by-machine-model-machine-id.html. This provides a list of models by SMBIOS where you can look up the specs of each Mac to determine which model your hackintosh is more closely related to.
Note: My Hackbook is a Lenovo P580 with an Intel i5-3210m processor. Looking at the list of Mac models, specifically Mac Book Pros, I see the model that uses the same 3210m processor as the “Mac Book Pro core i5 2.5 13” Mid 2012”. On the spec sheet listed on www.everymac.com, the model's SMBIOS is MacBookPro9,2, so that's the SMBIOS that I use (covered shortly). Later on I tried changing the SMBIOS to MacBookPro10,2 and it worked! It doesn't appear that anything has changed in the difference between selecting the SMBIOS, but changing the SMBIOS on your system may yield different results.
Years prior when transitioning from Mountain Lion to Mavericks, my old SMBIOS of MacPro3,1 no longer worked and I had to start using iMac13,1 as the SMBIOS. Why this happened is beyond me, but every OS X version since Mavericks has forced me to use iMac13,1. Perhaps MacPro3,1 is generic and the iMac13,1 is more specialized or fitting for my system configuration.
The Welcome Screen
The Apple logo should appear in the center of a black screen.
Note: I have two internal, solid state hard drives, both are PNY XLR8 120 GB drives. While I can distinguish them by the “Win” and “Mac” labels I stuck to the back of each drive, the system shows them as two versions in P0 as SSD2SC120G3LC726B104-370P, and P1 as SSD2SC120G3LA726B087-370P. This is the main reason why it's important to detach SATA power cables from any drives you will not be using, as you may not know which drive will be the one for OS X (especially if you have the exact models also being used as the above example shows). The entry highlighted above is the SanDisk Cruzer Glide 1.27, which is a USB flash drive. Your screen may appear different in the boot selection screen.
Please note that (at least with Gigabyte boards) some disks are shown but not all disks may be shown. For example, I have my system to load both UEFI disks for OS X and legacy disks for Windows. In the disk selection screen above, I may have the AOSO Optiarc DVD drive highlighted. If I press the down arrow twice and it jumps to the top highlighting the PO:SSD...104-370P, I know that all the disks are shown. However, if I start from the DVD selection then press the down arrow twice and nothing is highlighted, I know more disks are available but are not visible. Sometimes this can be a trial-and-error issue. For quicker results, only select the UEFI options only from the BIOS/UEFI screens instead of both UEFI and Legacy. When you install your Windows drive, then you can go back into the BIOS or UEFI and experiment with both UEFI and legacy.
Select your boot device with OS X and press Enter. This will take you to the Clover screen:
If you want to test the default values and try to reach the installer splash page, select the same boot drive to install OS X then press Enter. What you should see is a black screen with the white Apple logo in the center and a progress bar underneath of the logo. The first time it boots it will take 1-3 minutes (with a USB 3.0 flash drive) or slightly longer to reach the splash page. The splash page is a language selection screen with the words “Welcome” in various languages scrolling from right to left (explained later). If you're lucky you'll reach it on the first try, skip ahead to “The Welcome Screen”. Otherwise you may need to use boot flags or change settings first like the rest of us.
Boot Flags and setting the SMBIOS
While the flash drive has the OS X installer on it, you may need to use flags and make changes to Clover from the start to reach the installer if you get errors. The error or output that you get will help to determine what needs to be done. Does the system reboot part way when the progress bar is loading? Then you may need to go back into the BIOS/UEFI and ensure the Legacy/UEFI settings are in the correct order. Does the progress bar complete and take you to a black screen? You may need to check the video settings. Does the system freeze at some point when the progress bar is moving? You'll need to get more info by using the flag -v. In some cases (some. Don't hold it against me), the fix may be simple, starting with the SMBIOS.
The SMBIOS is an identifier that helps OS X work better with the hardware. For example, a desktop Hackintosh wouldn't use an identifier of a Mac Book Pro (laptop), but instead would use perhaps a Mac Pro or an iMac identifier. The SMBIOS is labeled with the name of the model, followed by a digit or two separated by a comma. There are different models with different features, and getting the right model is a crucial step in getting OS X to run on your hardware. So how do you know which SMBIOS to use?
The easiest way is to do a Google search with “SMBIOS hackintosh” and either the make and model of your laptop or your processor type. The second-easiest method for finding the SMBIOS is to head over to www.everymac.com/systems/by_capability/mac-specs-by-machine-model-machine-id.html. This provides a list of models by SMBIOS where you can look up the specs of each Mac to determine which model your hackintosh is more closely related to.
Note: My Hackbook is a Lenovo P580 with an Intel i5-3210m processor. Looking at the list of Mac models, specifically Mac Book Pros, I see the model that uses the same 3210m processor as the “Mac Book Pro core i5 2.5 13” Mid 2012”. On the spec sheet listed on www.everymac.com, the model's SMBIOS is MacBookPro9,2, so that's the SMBIOS that I use (covered shortly). Later on I tried changing the SMBIOS to MacBookPro10,2 and it worked! It doesn't appear that anything has changed in the difference between selecting the SMBIOS, but changing the SMBIOS on your system may yield different results.
Years prior when transitioning from Mountain Lion to Mavericks, my old SMBIOS of MacPro3,1 no longer worked and I had to start using iMac13,1 as the SMBIOS. Why this happened is beyond me, but every OS X version since Mavericks has forced me to use iMac13,1. Perhaps MacPro3,1 is generic and the iMac13,1 is more specialized or fitting for my system configuration.
The Welcome Screen
The Apple logo should appear in the center of a black screen.
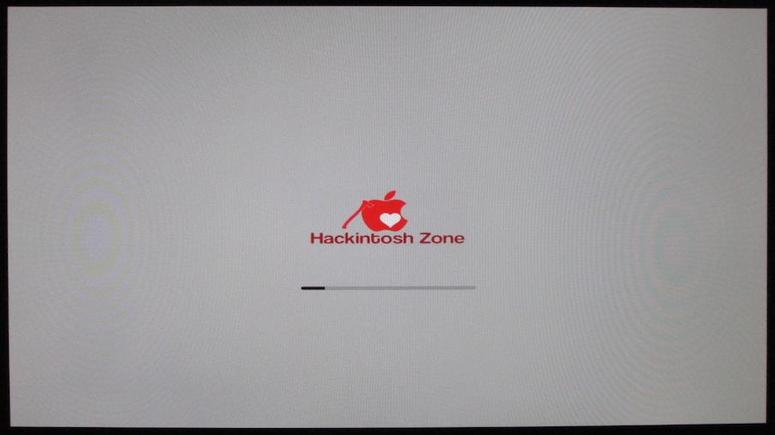
If you're using Niresh's version you will see their logo instead.
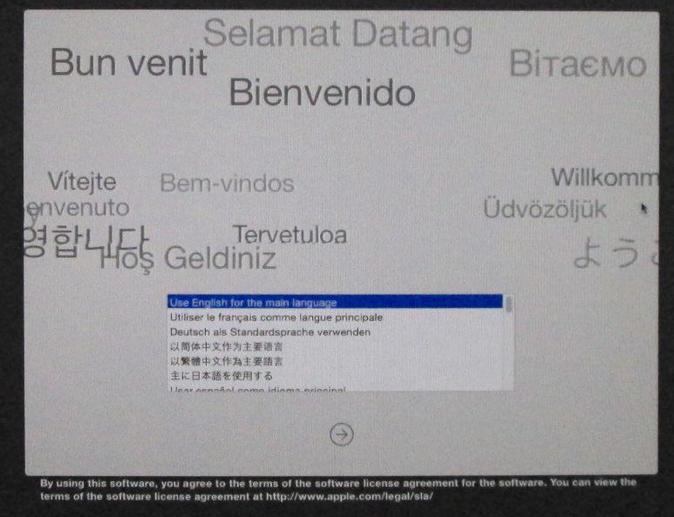
A second or two later you will see the progress bar. Since it is booting for the first time, the startup sequence will take longer than normal and future booting should not take as long. If everything is successful, you will be presented with the language selection screen with the word “Welcome” in various languages flying in from right to left.
If the language selection screen takes a seemingly long time to load, you may need to enter graphics injectors later on or download the latest video card updates for your particular card.
Select your language from the list, then click on Continue. The next screen will welcome you to installing OS X. You have the option to go straight to the installation, or use some of the utilities to perform actions on your drive first. If you need to format your hard drive first, read the next section; “Formatting the Drive”. If you have already formatted the drive and are using a Western Digital-brand hard drive for OS X, skip to the section; “Prepping a Western Digital Hard Drive”. If the drive is already formatted and is not a Western Digital-brand drive, skip the next two sections in this chapter and proceed to “Installing OS X”.
Select your language from the list, then click on Continue. The next screen will welcome you to installing OS X. You have the option to go straight to the installation, or use some of the utilities to perform actions on your drive first. If you need to format your hard drive first, read the next section; “Formatting the Drive”. If you have already formatted the drive and are using a Western Digital-brand hard drive for OS X, skip to the section; “Prepping a Western Digital Hard Drive”. If the drive is already formatted and is not a Western Digital-brand drive, skip the next two sections in this chapter and proceed to “Installing OS X”.
Formatting the Drive
Formatting the drive is very simple. On the Installer screen, go to the menu bar at the top and click on Utilities → Disk Utility. First, select the disk to be initialized for OS X from the left pane of the window. For this example I am formatting an external Toshiba 1.5 TB hard drive:
Formatting the drive is very simple. On the Installer screen, go to the menu bar at the top and click on Utilities → Disk Utility. First, select the disk to be initialized for OS X from the left pane of the window. For this example I am formatting an external Toshiba 1.5 TB hard drive:
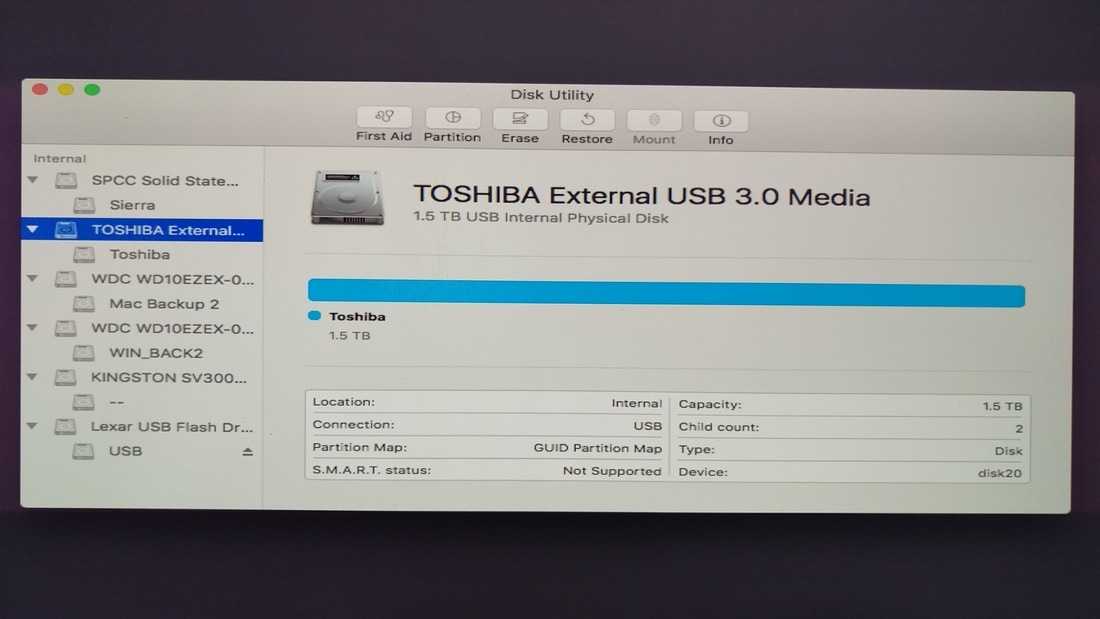
The left pane should show two entries for each device: the device itself listed as a piece of hardware, and the partition itself. In the above example, the physical hard drive is shown as “TOSHIBA External USB 3.0 Media” while the name of the existing partition is shown as “Toshiba”.
First you will need to erase your disk for OS X. Select your hardware disk from the left pane, then click on “Erase” from the top menu (non-stretched, completed version shown):
First you will need to erase your disk for OS X. Select your hardware disk from the left pane, then click on “Erase” from the top menu (non-stretched, completed version shown):

Name the disk, select “Mac OS Extended (Journaled)” for the format, and “GUID partition map” for the Scheme, then click on erase. When completed, click on Partiton from the graphical menu above.
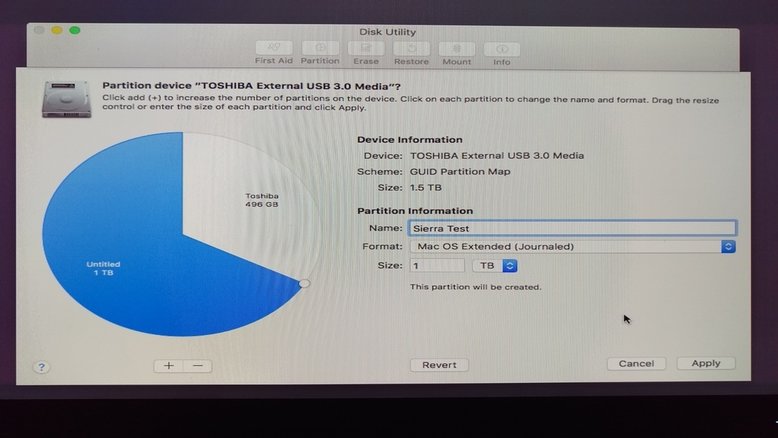
The new graphical representation is a pie chart showing one or more of the partitions. Click the plus symbol located to the left of the minus symbol below the graph. If your disk has only one partition, there will be a small circle in the 12 o'clock position. Drag this clockwise to resize the disk. In the above example I am setting 1 TB reserved for Sierra (as the selected partition is highlighted in blue) and will name it “Sierra Test”, while the remaining 496 GB I am reserving for something else or nothing at all. I can select the 496 GB and format it for Windows or Mac, but for this example I am leaving it as-is. Name your partition appropriately, select “Mac OS Extended (Journaled)” for the format. The fields below allow you to type in a more accurate size if needed and allows you to choose Kilobytes, Megabytes, Gigabytes, and more.
When you're finished, click on “Apply”. The disk will be partitioned and you can proceed to the next set of steps.
When you're finished, click on “Apply”. The disk will be partitioned and you can proceed to the next set of steps.
At "Installing OS X":
Now the fun begins! If you haven't booted your computer yet, boot from your flash drive installer and select the name of your flash drive in the disk selection (which you named earlier after formatting the flash drive). After a light grey screen with an Apple logo (or an Apple with an axe in it for Niresh's version) you should arrive back at the language selection screen. Select your language and click on the arrow to continue.
Now the fun begins! If you haven't booted your computer yet, boot from your flash drive installer and select the name of your flash drive in the disk selection (which you named earlier after formatting the flash drive). After a light grey screen with an Apple logo (or an Apple with an axe in it for Niresh's version) you should arrive back at the language selection screen. Select your language and click on the arrow to continue.

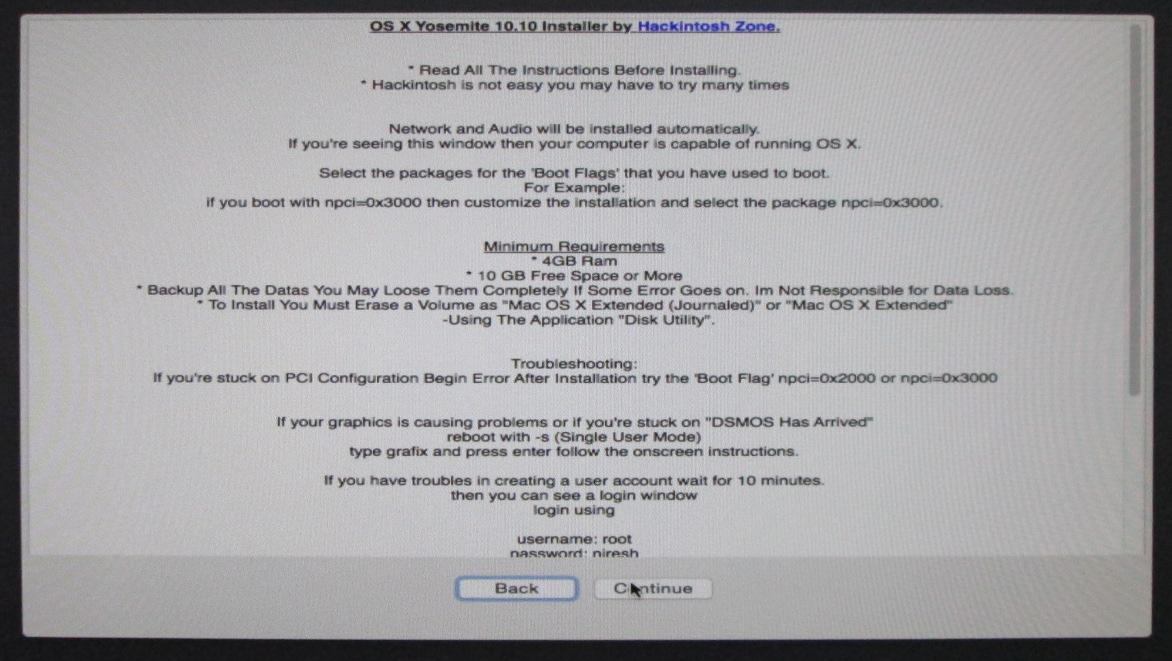
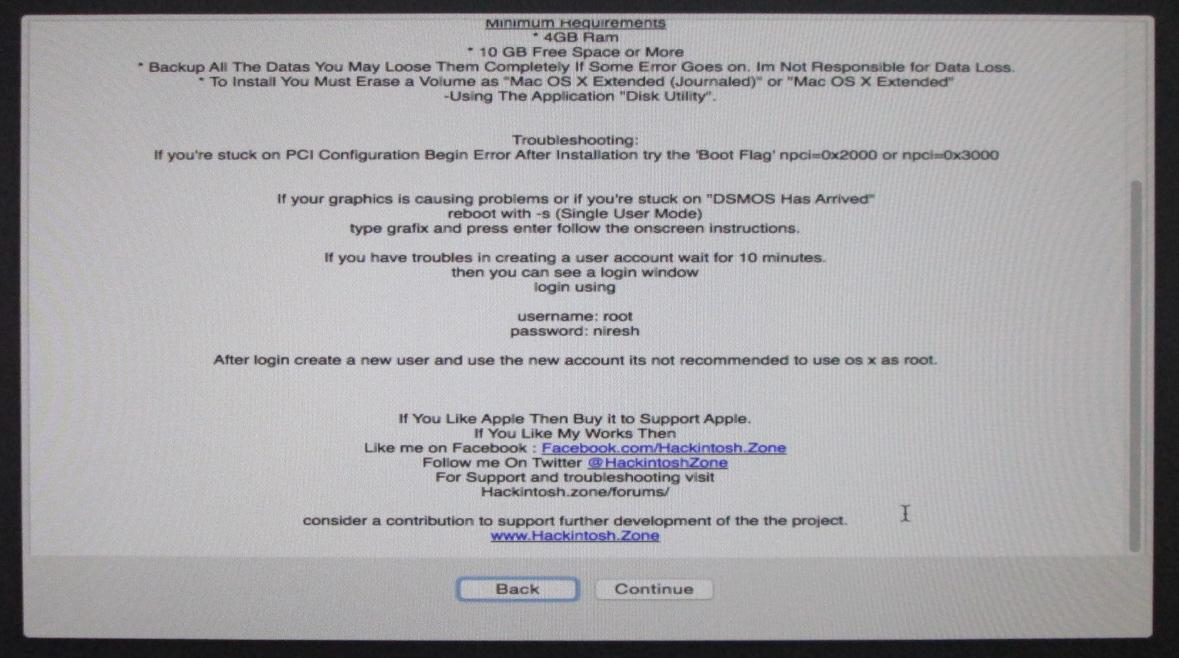
Click on Continue, then click on Agree. If you downloaded OS X via the App Store the next window gives you a basic overview. If you downloaded OS X from Niresh you'll see helpful hints instead (Yosemite installer shown):
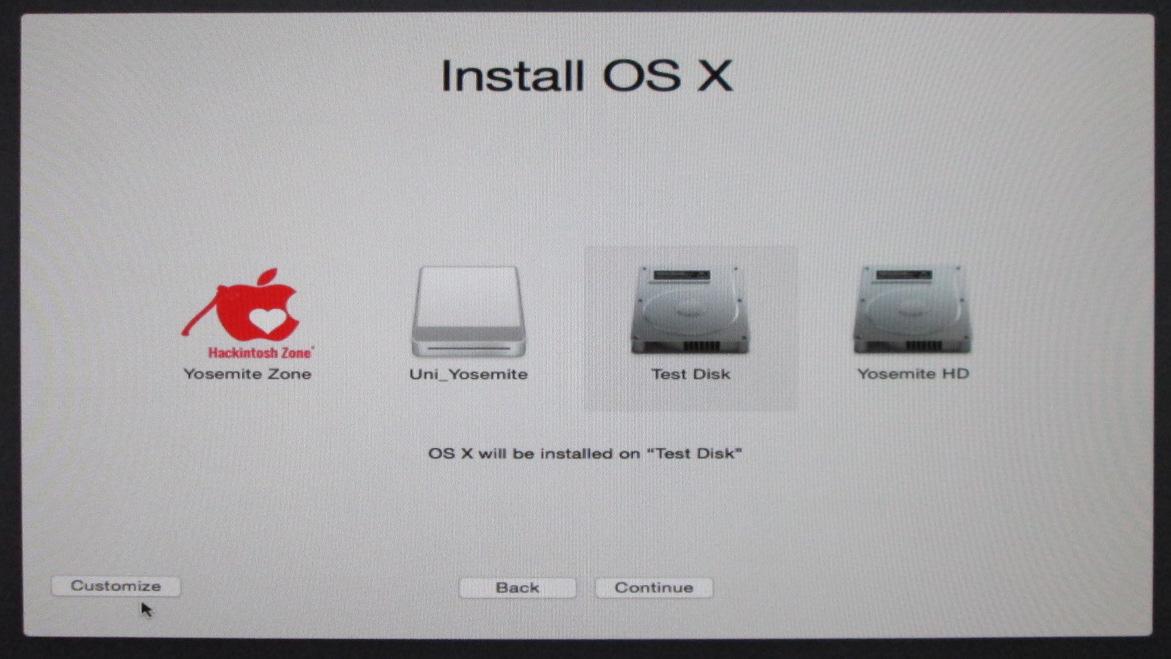
Click on Continue, then click on Agree. This will take you to the disk selection screen (Niresh Yosemite version shown):
(The remaining photos and text are the same and have not changed until the next section).
At "Troubleshooting - Installation and Post Installation":
Do not be discouraged if you can't get OS X installed quite yet. While the installation process has been easier to do over time, things can go wrong. After all you're attempting to use proprietary software on near-universal hardware. Perhaps your screen froze at some point during the installation, or it was going smoothly but the screen turned grey with a bunch of code over top of the graphics (kernel panic). There are ways to diagnose and fix these types of errors using boot flags. Boot flags are simple commands you type in after you booted your computer but before you press enter after selecting the hard drive to boot from. Remember, to enter boot flags, under Clover go to Options → Boot Args, then press enter. You can enter any flags in any order, but note that some of the flags are case-sensitive. A complete list of boot flags including specific flags for AMD processors can be found on a thread on InsanelyMac.com: http://www.insanelymac.com/forum/topic/99891-osx-flags-list-for-darwin-bootloader-kernel-level/.
Do not be discouraged if you can't get OS X installed quite yet. While the installation process has been easier to do over time, things can go wrong. After all you're attempting to use proprietary software on near-universal hardware. Perhaps your screen froze at some point during the installation, or it was going smoothly but the screen turned grey with a bunch of code over top of the graphics (kernel panic). There are ways to diagnose and fix these types of errors using boot flags. Boot flags are simple commands you type in after you booted your computer but before you press enter after selecting the hard drive to boot from. Remember, to enter boot flags, under Clover go to Options → Boot Args, then press enter. You can enter any flags in any order, but note that some of the flags are case-sensitive. A complete list of boot flags including specific flags for AMD processors can be found on a thread on InsanelyMac.com: http://www.insanelymac.com/forum/topic/99891-osx-flags-list-for-darwin-bootloader-kernel-level/.
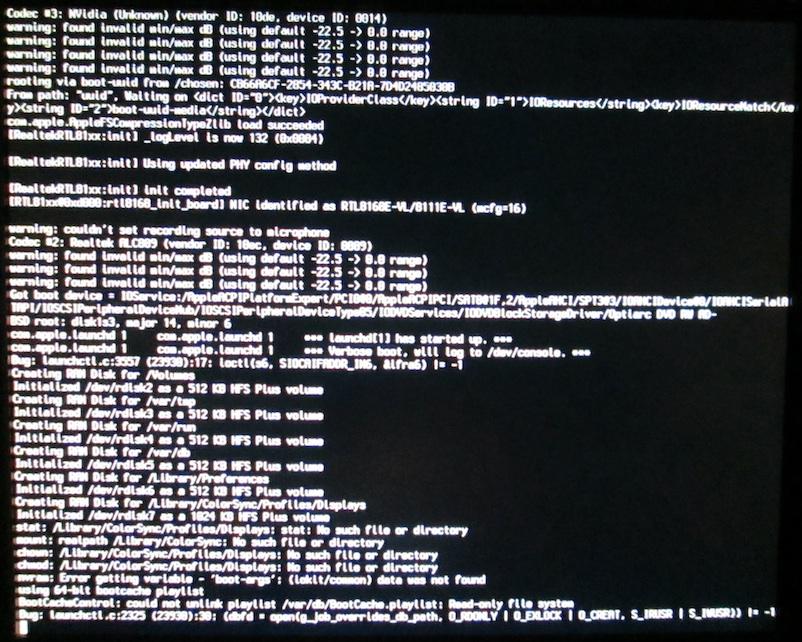
One of the most helpful troubleshooting tips when booting is to use the -v key. This tells the computer to boot up in verbose mode, which prints out a list of files and data that OS X loads to boot. Under normal circumstances while the Apple logo appears on a black screen, the progress bar underneath the logo changes to show how far the progress is. In verbose mode, you don't see the Apple logo for most of the time but instead see text on the screen showing the files that are loading. This increases the time it takes to startup, but when the system hangs or freezes it will do so on the last set of commands. The last set of code is what you'll need to perform a Google search on in order to find a solution. For example, if it freezes on the message “Waiting for DSMOS”, you can google the phrase Hackintosh “Waiting for DSMOS”.
Notes: Whenever I'm troubleshooting issues for someone, I always tell people “Chances are, you're not the first person to experience this issue, so more than likely there's an existing solution for it”. The same principle applies to troubleshooting Hackintosh systems.
Also, don't dismiss long delays with freezes. Aside from the first time boot to the installation, there could be other things going on to cause a delay or hang where the issue may resolve itself in a minute or so. On my Hackbook, the black screen with the Apple logo appears. At the halfway mark, the graphics become distorted with the apple becoming broken lines staggered across the screen temporarily, only to return to its original look and the progress bar completing to the right.
Another tip is to boot in safe mode by using the -x flag. This boots into OS X with only the minimum of kexts needed to get into OS X. OS X from the App Store and OS X from Hackintosh Zone show the verbose mode text a bit differently. If there appears to be a problem and the machine goes into a kernel panic (similar to the text above), the font appears the same way and stops at the location where the machine is having the issue. In some cases, depending on the error, the machine may appear to have frozen for some time, but after a while it may or may not resume loading everything and still boot into OS X. Verbose mode is the preferred way to display what happens when OS X will not load properly. The last few lines of text may show an issue with the Bluetooth controller or something such as “PCI Configuration begin”, and these errors are helpful in determining what other flags need to be entered or if something needs changed to the BIOS/UEFI.
(The remaining photos and text are the same and have not changed until the next section).
At "Setting Up Your Account":
Once you are able to reboot successfully you should be at the screen to begin setting up your account. If you're using an AMD or Nvidia graphics card, the graphics may appear stretched until you load the drivers. This is normal.
Once you are able to reboot successfully you should be at the screen to begin setting up your account. If you're using an AMD or Nvidia graphics card, the graphics may appear stretched until you load the drivers. This is normal.
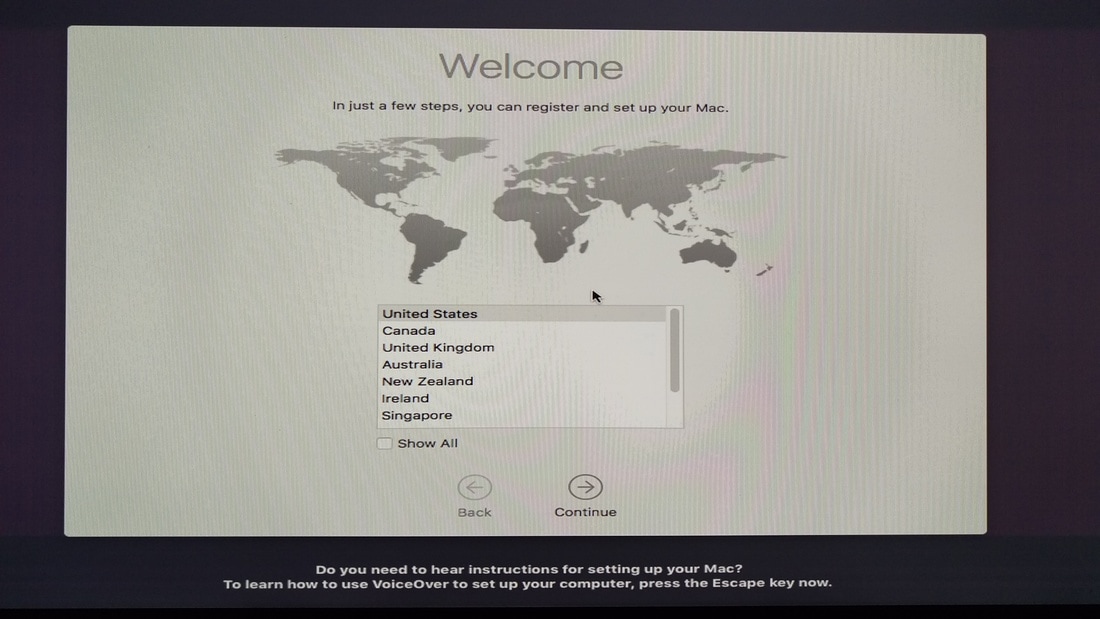
Here you can select your region and click on “Continue”.
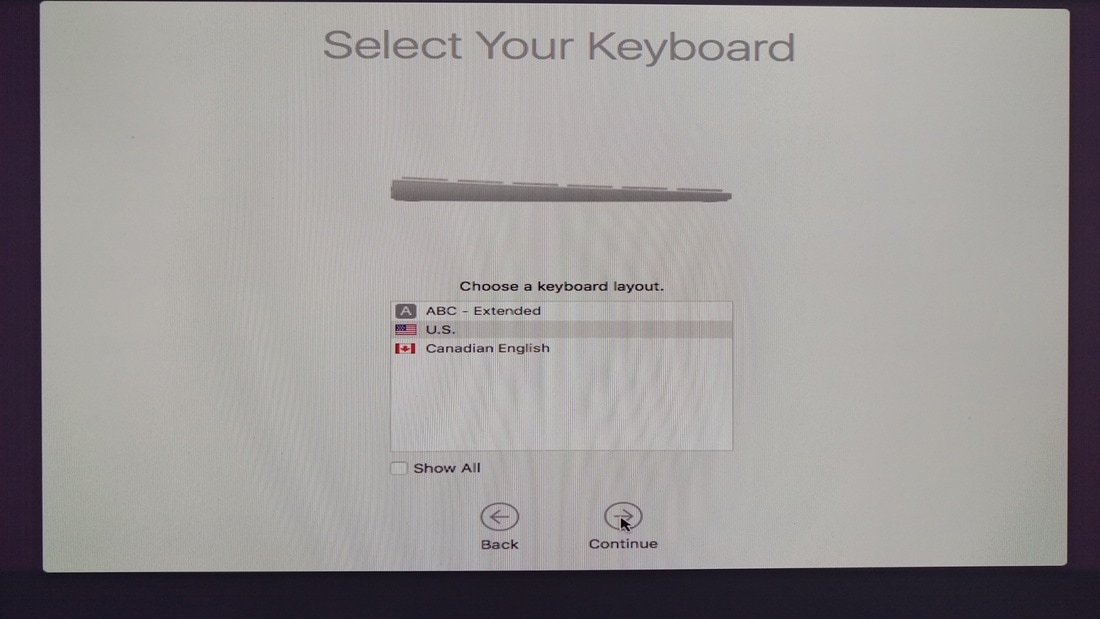
Select your keyboard type here. If your keyboard type isn't listed, click on the box “Show All” for a comprehensive list. When you're finished, click on “Continue”. The next screen will prompt you for an Internet connection type.
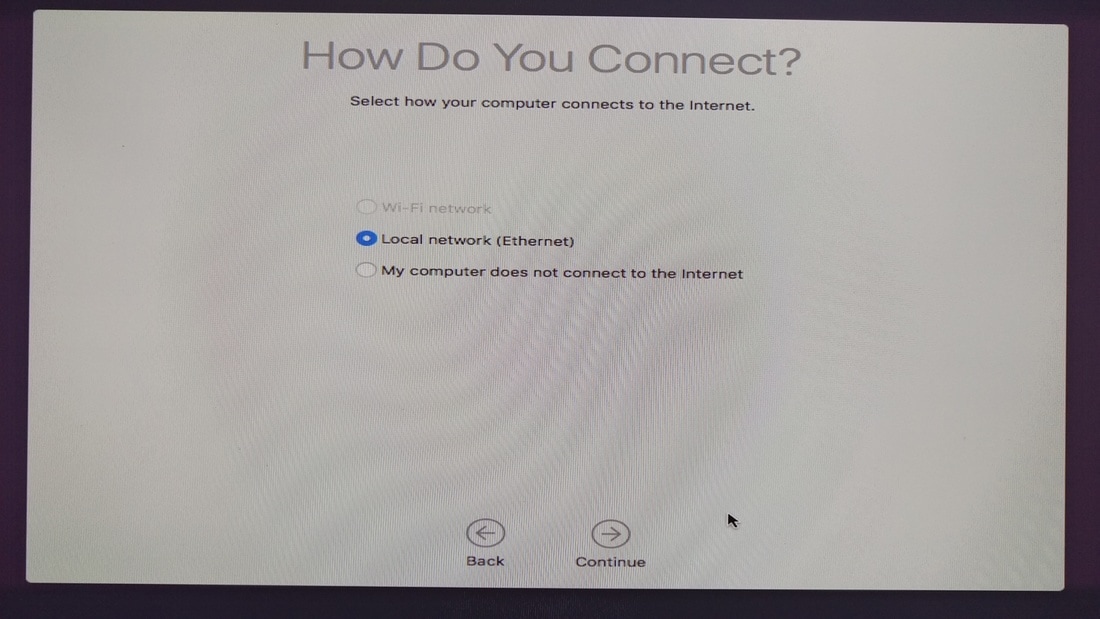
Because my Hackintosh is WiFi, I select the option “My computer does not connect to the internet”. You should select this too for now. You'll get a prompt telling you your Mac isn't connected to the Internet. For this message just click on Continue. Once you have the WiFi and/or Ethernet drivers set up for your machine, you should be able to get Internet access on your system.
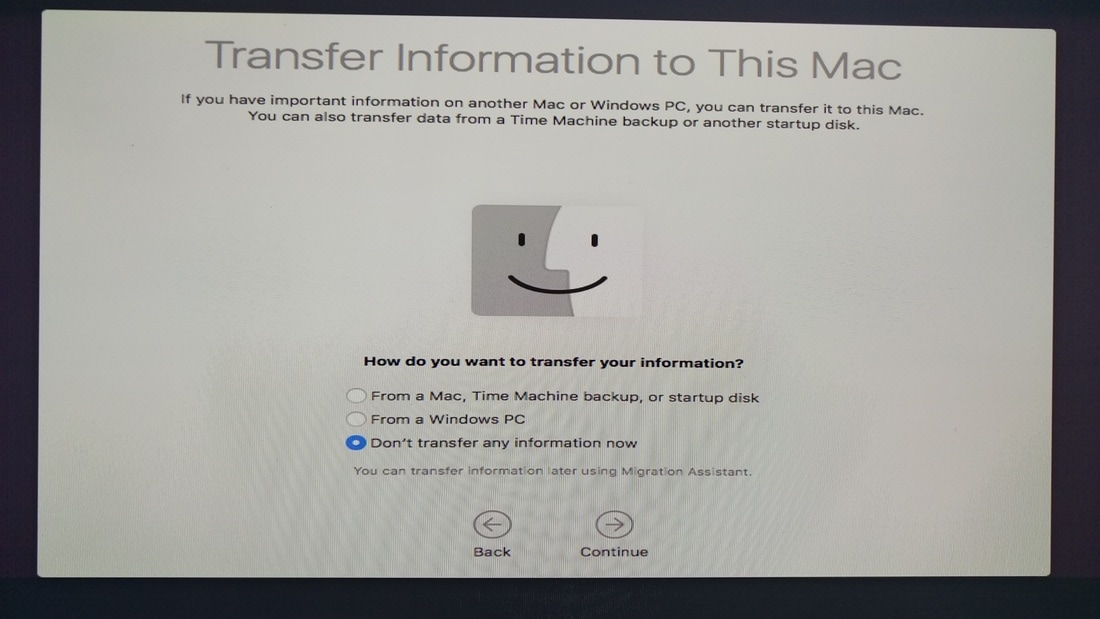
If this is your first time setting up and you don't have any existing OS X data, click on “Don't transfer any information now”, and click on “Continue”.
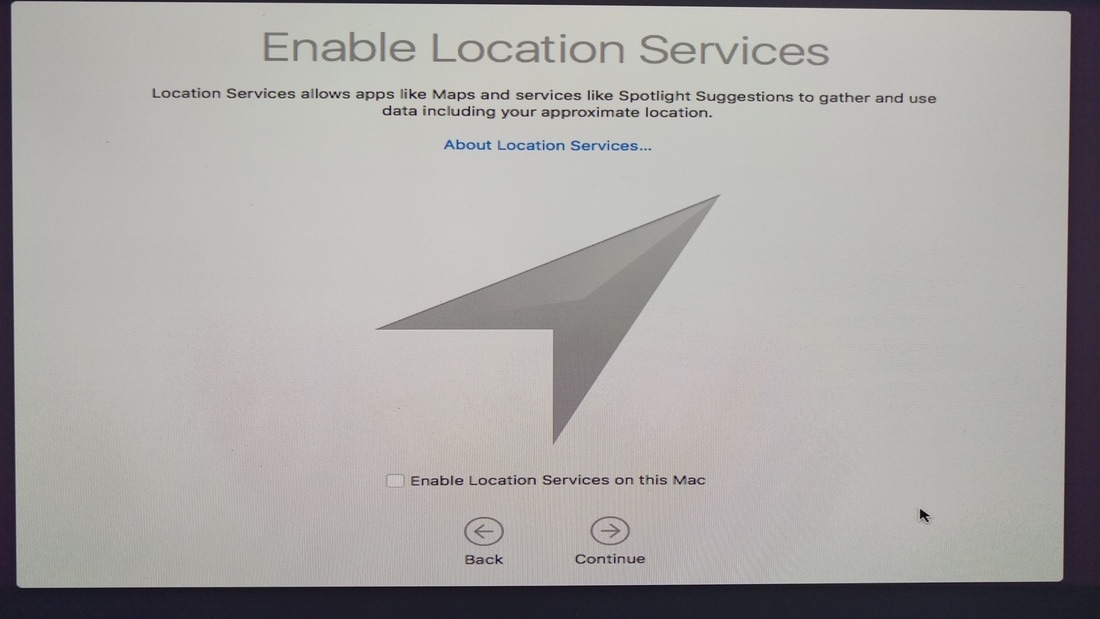
Here you can turn on location services. This is handy for Apple maps and when browsing the Internet for specific locations (ie, finding a store or restaurant in your area). Click on “Continue”.
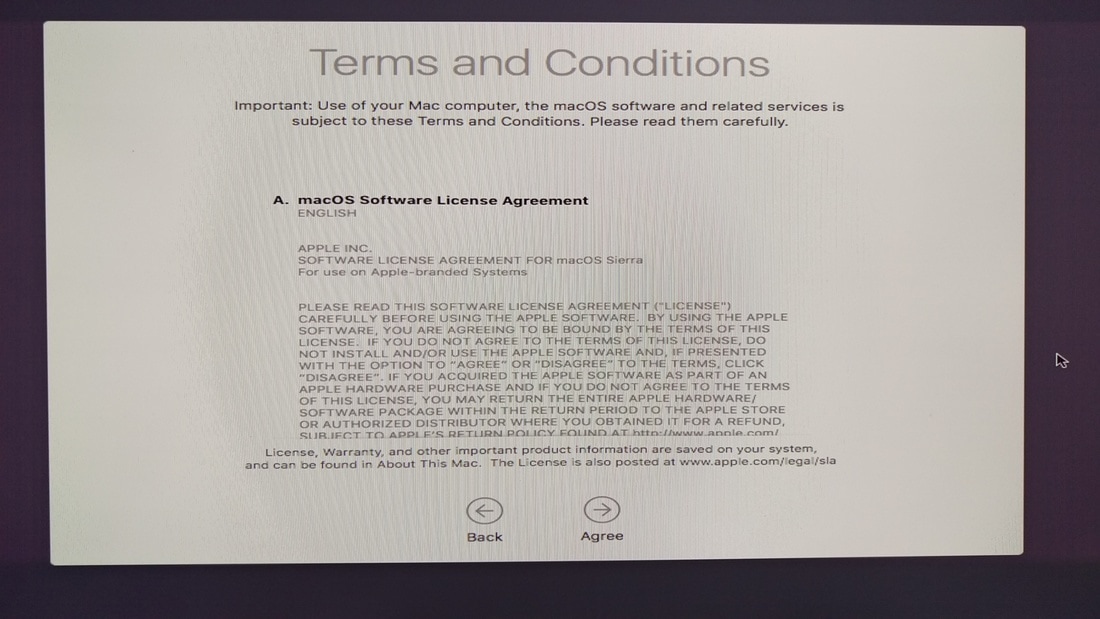
This screen provides you with a long list of terms and conditions. Click on “Agree”, and you'll be presented with a small drop-down box from the top.
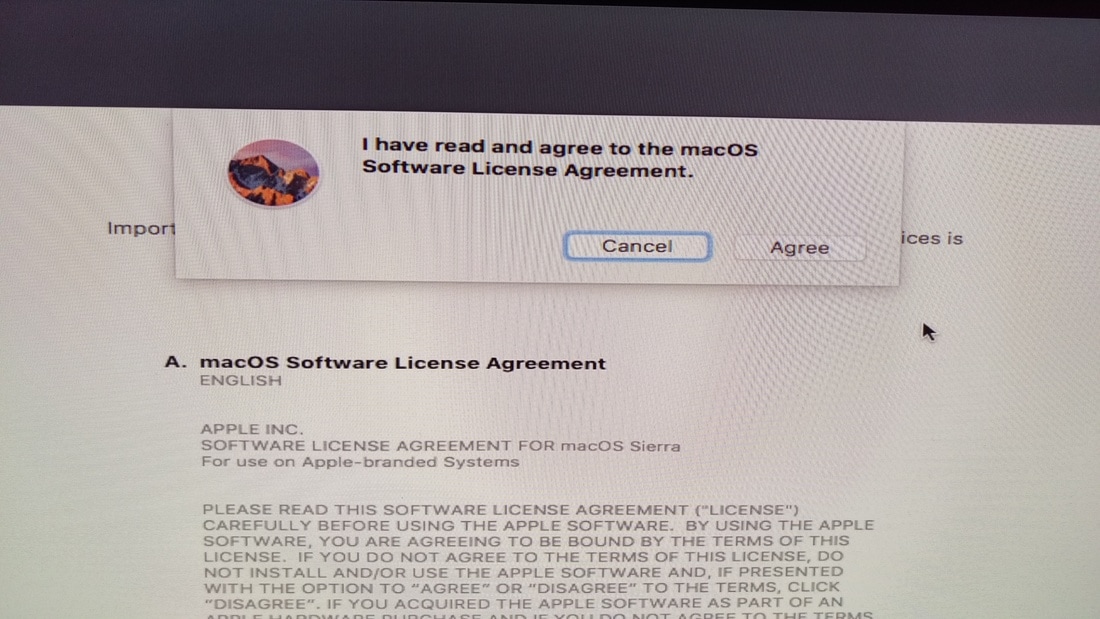
Click “Agree” on this drop-down box and you'll get to the next screen:
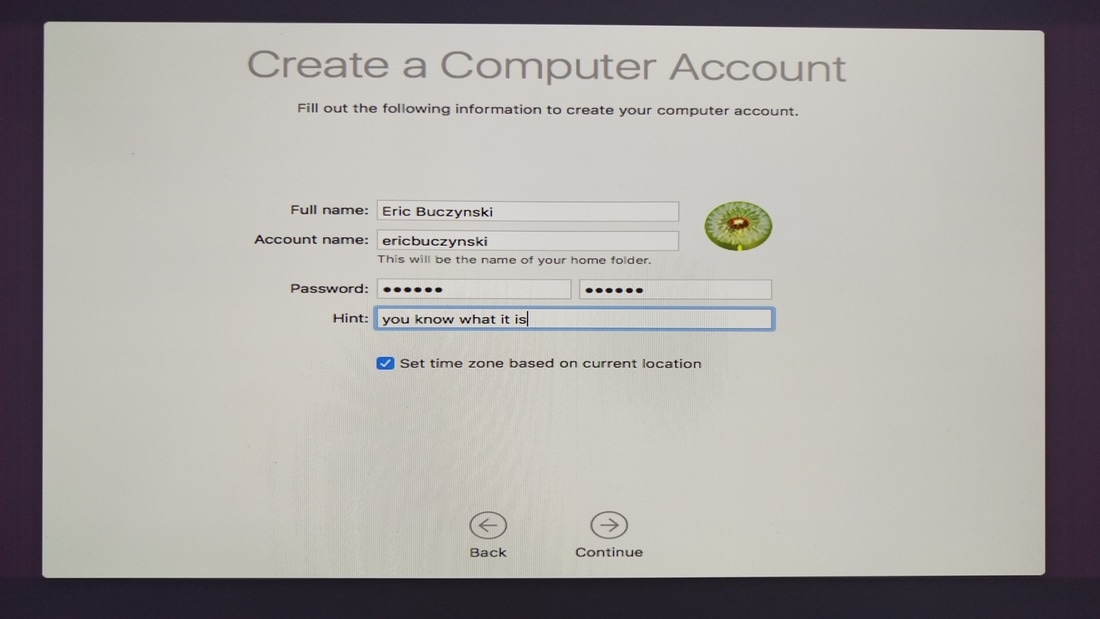
Now you can type in your name and password. The password is used whenever you need to install additional software or make important changes regarding security and other matters. The password is also used to log in to the computer. Later on you can set it so that it doesn't prompt you for your password any time you boot the machine or wake it from sleep.
Your name gets abridged to one word for the login, but you may use the abridged version or spell out your name when you log in. You may also create a password hint and choose an icon to identify your account. When you click on Continue, your Hackintosh will be saving this information as noted by the status in the lower left hand corner.
Note to Niresh Yosemite Installers: If you seem to encounter an error where your enter your information here and the screen remains frozen or in an endless loop, simply reboot your machine and re-do the process. When it comes up requesting that you set up your login and password info, set the username as “root” and the password “niresh”. Using those settings, continue to give it up to ten minutes to set up your account if the screen doesn't seem to progress in under 10 seconds.
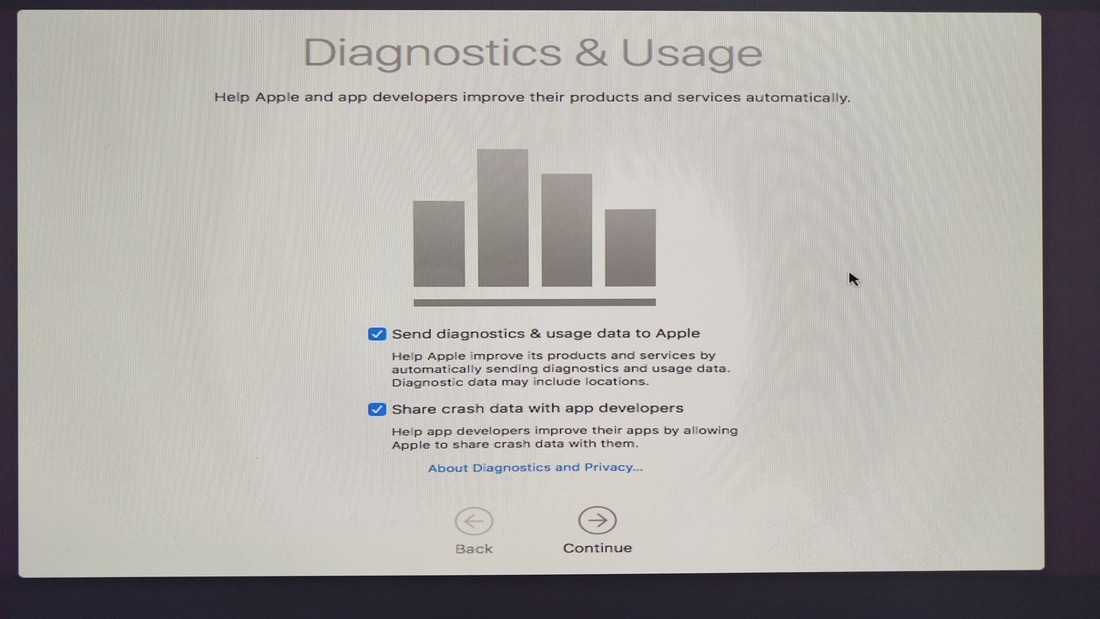
The Diagnostics & Usage page allows you to share or keep data with Apple and its developers. Even though you're using OS X on non-Apple hardware, Apple wont track you down and come after you if you have these checked.
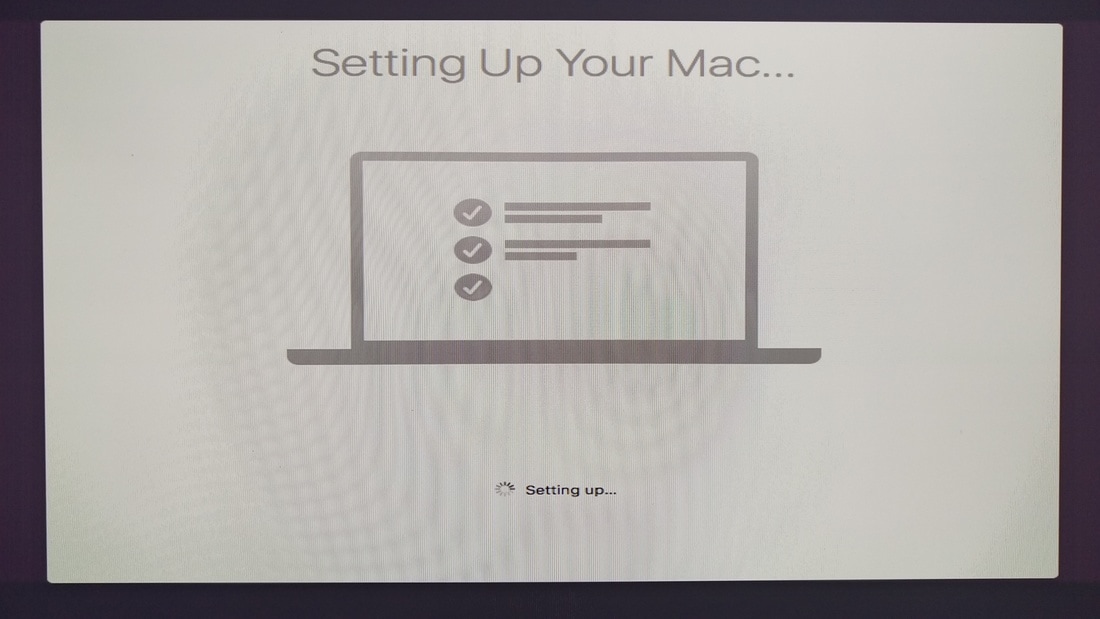
The last step takes a little while longer as it sets up everything for you and prepares to launch the desktop (know in OS X terms as the Finder). Once everything is set up it will take you to the desktop. If you've made it this far it's a safe bet that your machine can run OS X.
The first thing you may see is a large pop-up window prompting you for the keyboard layout:
The first thing you may see is a large pop-up window prompting you for the keyboard layout:
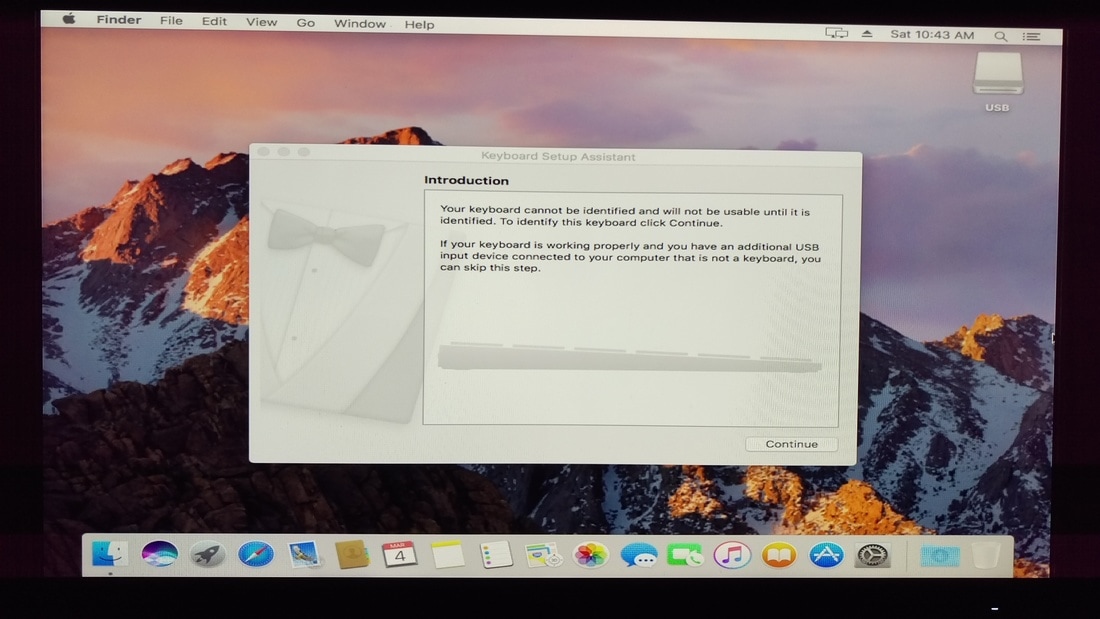
Click continue, select your type, and the pop-up will disappear. Click on the Apple menu and select “About This Mac”:
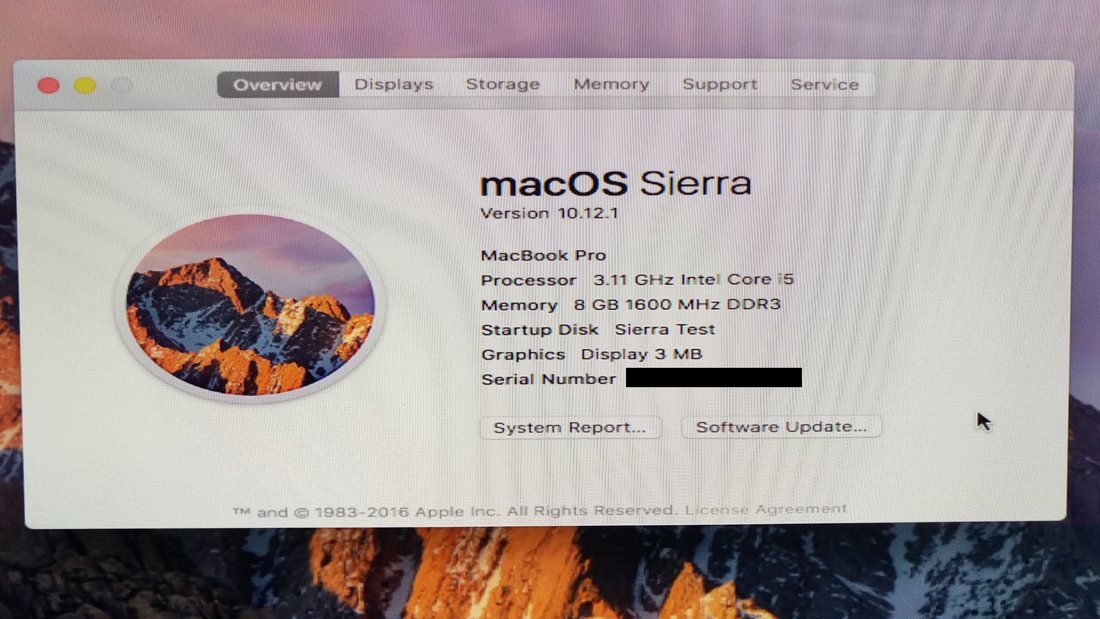
Here you can see information about your Hackintosh including the model type, processor and memory, and more. While you're not yet connected to the internet, the Software Update button won't do much. At least not yet. You can click on System Report for more detailed information regarding your hardware (similar to Device Manager in Windows without the capability to add, update, or remove drivers).
Note: The above photo was taken when installing Sierra to my existing Hackintosh desktop using a Toshiba external hard drive. The window incorrectly recognizes it as a MacBook Pro and is only showing 3 MB of the 2 GB of video graphics. You'll want to check the same status on your machine by going to "About This Mac". It's not so much ensuring that the correct machine is listed but rather ensuring that all of the video RAM is accounted for and that the amount of RAM is accounted for as well. The BIOS/UEFI will indicate the latter as well.
The normal window from “About This Mac” from my own working Hackintosh is below:
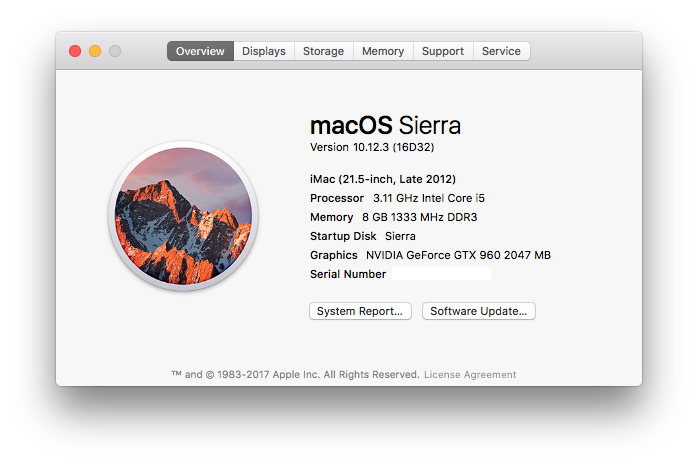
The correct model is shown thanks to me setting the SMBIOS properly and the full 2 GB of graphics is counted.
Look closely at the identifier next to the version number. You can get the same identifier by clicking the version number on your screen. Make note of this number if you are using Nvidia graphics as you may need this to identify the software drivers needed for your OS version.
If you installed the Niresh version you will see notifications message pop in and out on the upper right hand side of the screen. These messages notify you that the software is automatically making changes to optimize your system, enabling OS X to work to its full potential from the initial installation. Please do not shutdown or restart your machine until you see a notification advising you that it has finished. You'll also notice an icon of an apple with an axe in it. This is a shortcut to the Hackintosh Zone website.
(Later in the chapter at "To allow software to be installed that is not available"):
Under the General tab, you can choose to allow apps to be installed from either solely the App Store, or the App Store and identified developers. While this fits the need of genuine Mac users, Hackintosh users have to rely on outside and identified developers, but can also use the App Store with ease. When you attempt to open up a program outside of the App Store like the files from Tonymacx86.com, you will get a pop-up warning similar to the one below.
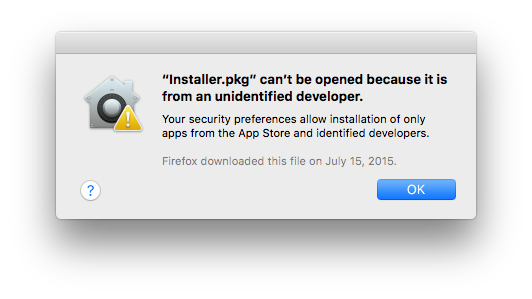
The pop-up states that the program can't be opened because it's from an unidentified developer. Don't fret, because this can still be opened easily. Click OK to clear the pop-up box, then go back into System Preferences → Security. Back at the General tab, the previous attempt to open the package appears at the bottom:
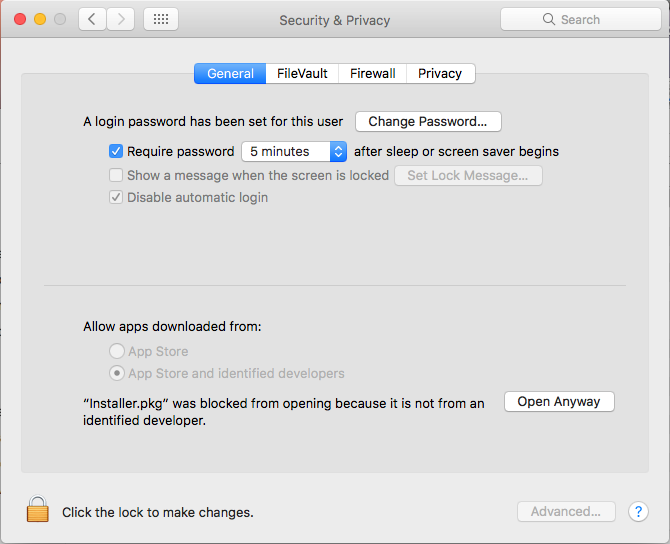
It states that the program was blocked from opening, but you only need to click on “Open Anyway” and the program will open. If the file is an installer, and you've completed the installation; OS X now gives you the opportunity to delete the installer or keep it. Just to save myself the hassle if I mistakenly delete the program, I always keep the installer. I also keep it so that I can drag and drop it to my other internal hard drive as a backup.
If you don't wish to keep repeating the process, there is a way to disable the security check for reoccurring. In a Finder window go to your Applications → Utilities → Terminal and type in the following:
sudo spctl –master-disable
Press Return/Enter, then enter your password. Close (if open) System Preferences then reopen it and return to Security and Privacy. Under the General tab, there will now be an option for “Anywhere” for the choice “Allow apps downloaded from”. Now when you install a new program, it should not block you from doing so. The only difference may be in Nvidia software drivers, covered shortly.
