
Ethernet Networking and App Store Access in OS X Sierra
Anytime a new OS X version came out, I knew I had to wait because my WiFi drivers were not updated right away for the new OS. Consequently, I would sometimes have issues getting into the App Store as well. Sierra was no exception, until now, using an old trick.
The first time I ran into issues connecting to the App Store, I resorted to using the NullEthernet.kext along with adding or modifying the SSDT.aml file. Once I got it working, it ran smoothly and I had no issues getting in to the App Store. For some reason I didn't have to modify the SSDT.aml file when using El Capitan. The directions for the fix are located here, Layman's guide to access Mac App Store with NullEthernet.kext (page will open in a new tab or window). The page was created in Early 2014 and is slightly outdated. This is due to directions involving the Extra folder which is no longer present in systems that use Clover as the bootloader. The last pages at the end of the thread show an easy fix for it though, but here are the same steps condensed:
1. Head over to RehabMan's BitBucket downloads for the Null Ethernet kext located here. The link is also located on my downloads page on this site. Download the latest version (RehabMan-Nullethernet-2014-1016.zip as of this writing).
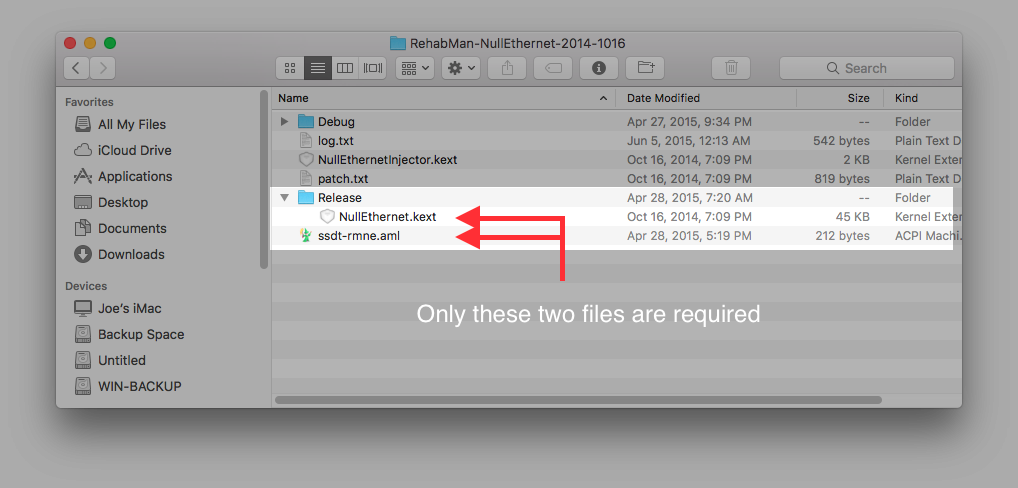
2. Open up the folder to see the files. You will only need the two files in the release folder; NullEthernet.kext, and ssdt-rmne.aml.
The first time I ran into issues connecting to the App Store, I resorted to using the NullEthernet.kext along with adding or modifying the SSDT.aml file. Once I got it working, it ran smoothly and I had no issues getting in to the App Store. For some reason I didn't have to modify the SSDT.aml file when using El Capitan. The directions for the fix are located here, Layman's guide to access Mac App Store with NullEthernet.kext (page will open in a new tab or window). The page was created in Early 2014 and is slightly outdated. This is due to directions involving the Extra folder which is no longer present in systems that use Clover as the bootloader. The last pages at the end of the thread show an easy fix for it though, but here are the same steps condensed:
1. Head over to RehabMan's BitBucket downloads for the Null Ethernet kext located here. The link is also located on my downloads page on this site. Download the latest version (RehabMan-Nullethernet-2014-1016.zip as of this writing).
2. Open up the folder to see the files. You will only need the two files in the release folder; NullEthernet.kext, and ssdt-rmne.aml.
3. Launch Clover Configurator. When launching for the first time post-boot you may get a message such as this:
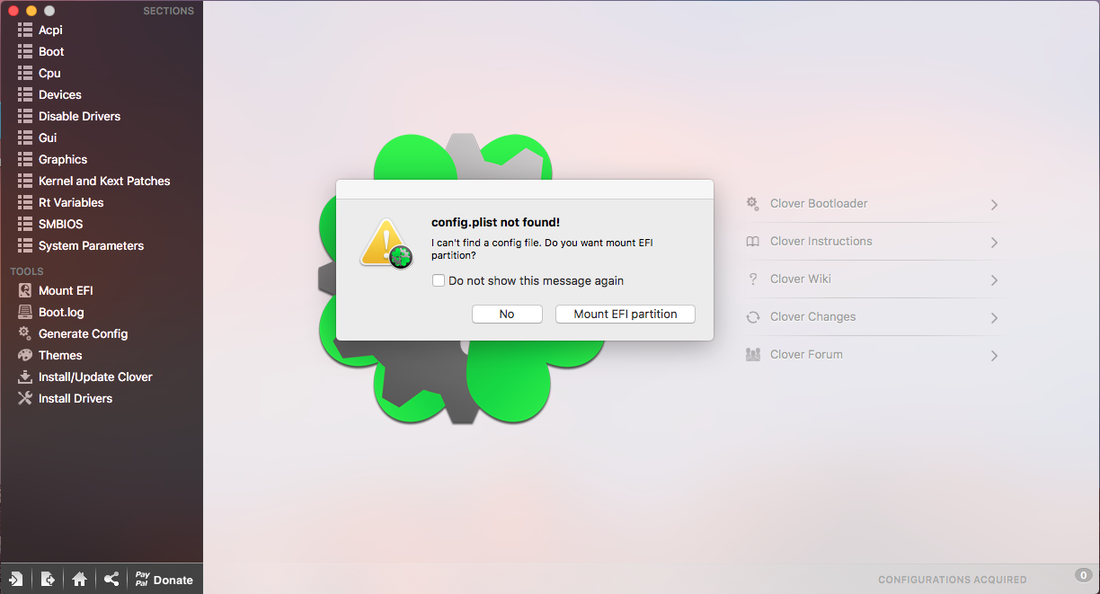
4. Click "Mount EFI partition. The EFI partition is the hidden section of the disk that contains info needed to boot your Hackintosh. This will present a blank screen to the left of the pane. Click "Check Partition" and a list of your currently connected drives will appear, similar to this:
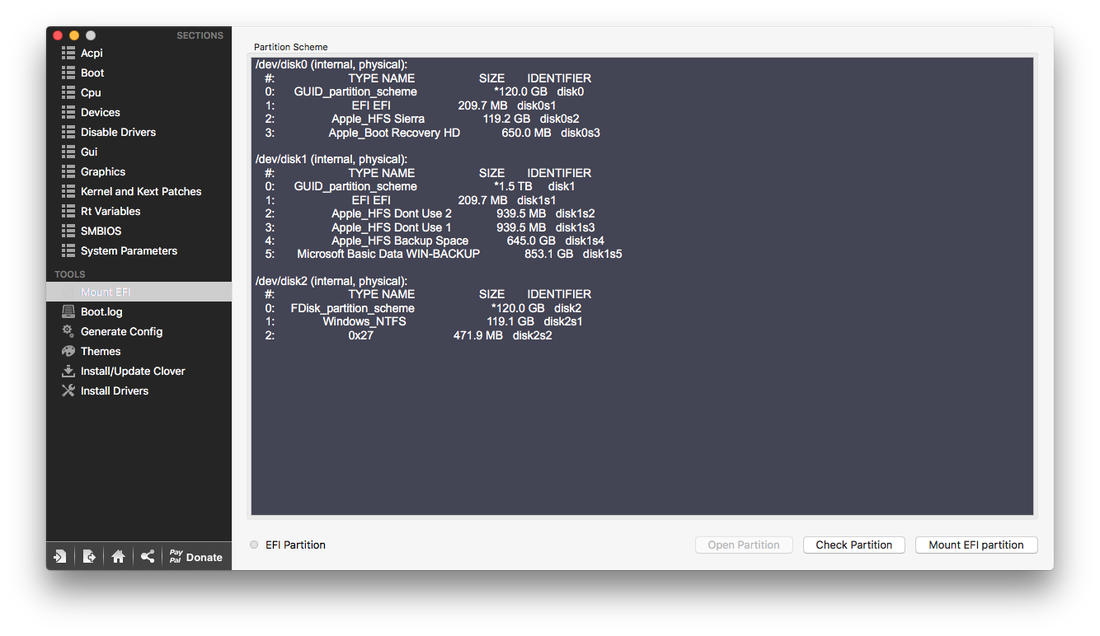
The above example shows the internal drives and hidden partitions of those same drives of my own system. Here, three drives are listed; /dev/disk0, /dev/disk1, and /dev/disk2. Disk 0 is my Sierra hard drive as noted by the name I gave it following the "Apple_HFS" label. The EFI partition I want to mount is disk0s1 (third selection from the top under "/dev/disk0 (internal, physical):"
5. In the above example I would click "Check Partition".
5. In the above example I would click "Check Partition".
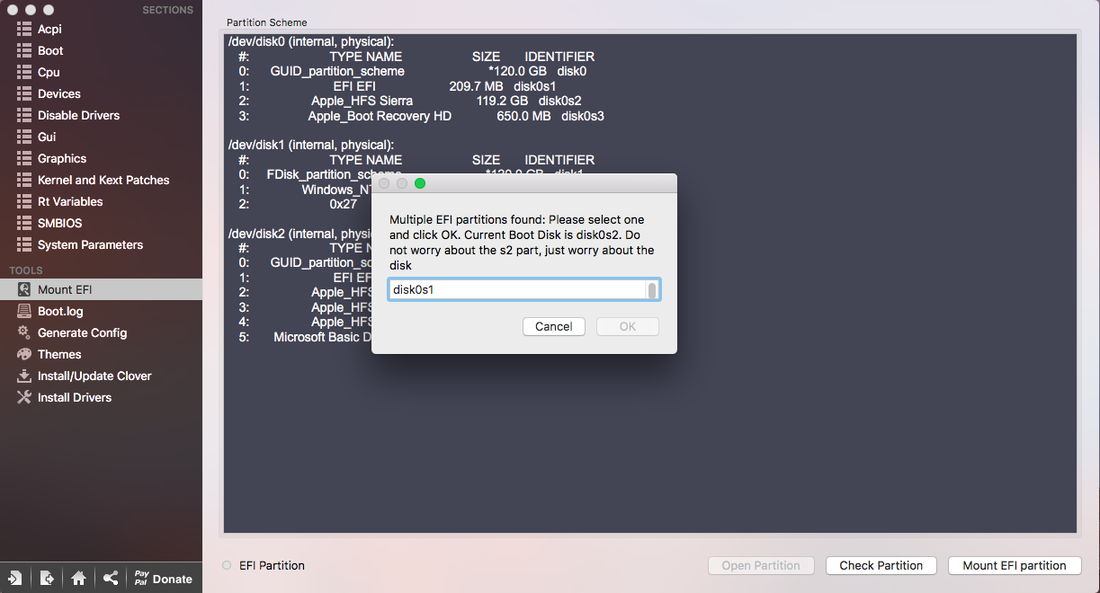
A small pop-up box will appear asking which EFI partition you would like to mount. The window is very small but you can click in it and use the arrow keys on your keyboard to scroll down and select your Sierra's EFI partition.
6. In my example, disk0s1 is the one I want, so I click on it, then click OK. Another pop-up appears wanting me to enter my password. I type it in and press enter, then my EFI drive is visible (highlighted in the left pane, below):
6. In my example, disk0s1 is the one I want, so I click on it, then click OK. Another pop-up appears wanting me to enter my password. I type it in and press enter, then my EFI drive is visible (highlighted in the left pane, below):
7. Now go back to the RehabMan-NullEthernet folder. Use Kext Utility or Kext helper to load the NullEthernet.kext file. Kext Helper can be found here. You can load the kext by right-clicking it and opening with Kext Helper or by dragging and dropping it into the window of Kext Helper. In any case, type in your password, then click "EASY INSTALL". The program will do its thing, then prompt you to restart, which is not needed as of yet.
Note: I've always had issues getting Kext Helper to quit after I've had it install a kext. If you have the same issue, hold down Command + Option + Escape to bring up the process box, then quit Kext Helper manually.
8. The remaining file in that folder is the ssdt-rmne.aml file and this will be manually moved to the proper folder in the EFI drive. With the RehabMan-NullEthernet folder open, open up a new finder window (Command +N). Click the EFI drive on the left pane of the new Finder window, then navigate to EFI/ClLOVER/APCI/patched. To save time, make a copy of the file in the new folder by holding down the option key, clicking the ssdt-rmne.aml file, then dragging and dropping it in the EFI/CLOVER/APCI/patched folder. Now restart your system.
9. Only a few more steps left to go. Open System Preferences --> Network. Delete all of the entries for each network interface type you have. Sierra now handles removal of network interfaces differently than in earlier OS X versions. With every type you remove, it prompts you whether or not you want to have it re-added later. Click "no" for each prompt.
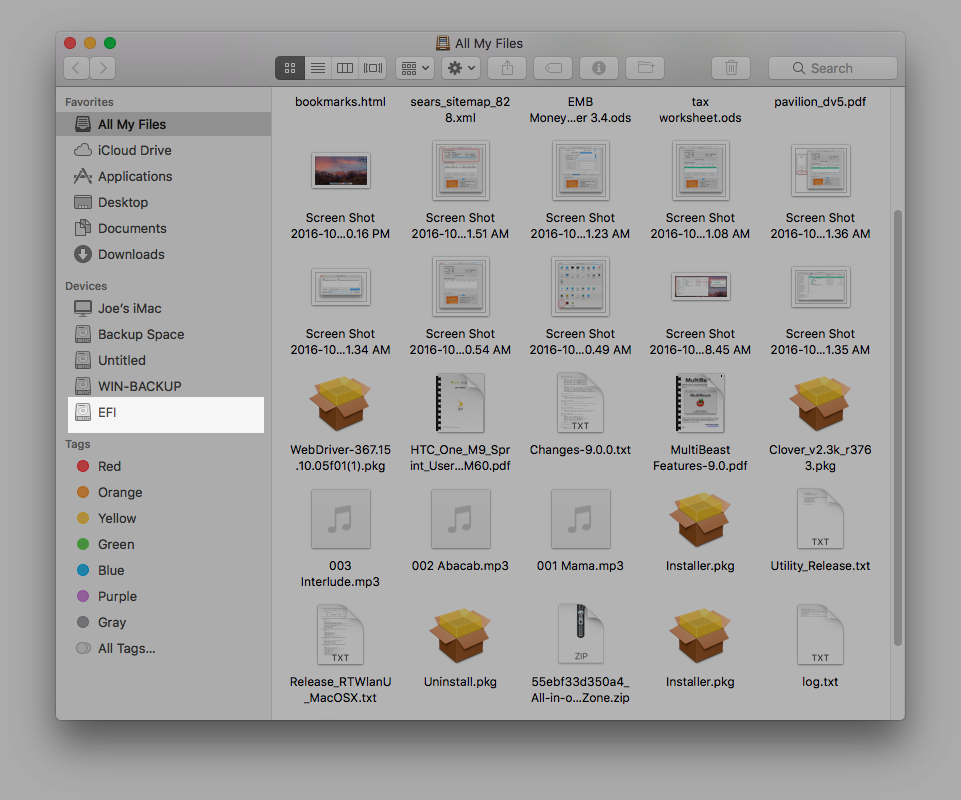
10a. For this next step you may need to enable access to root in the sidebar of the Finder window. Go to Finder (desktop), Finder (in the menu bar),and then Preferences. In the sidebar tab, ensure that your Hackintosh has the checkmark next to it under "Devices". then close the window.
10b. Now we have to navigate to a folder in the System. Double-click the name of your Sierra hard drive, then navigate to Library/Preferences/SystemConfiguration. Delete the NetworkInterfaces.plist or drag it to the trash, enter your password to confirm this, empty the trash, then reboot again.
11. When your system comes back up, go back into System preferences --> Network, then click the plus symbol to start re-adding the interfaces again. Be sure to add the Ethernet first, then any WiFi, Bluetooth, or other devices. After a few seconds you should be able to launch the App Store, sign in, then it should recognize your login and password.
Note: I've always had issues getting Kext Helper to quit after I've had it install a kext. If you have the same issue, hold down Command + Option + Escape to bring up the process box, then quit Kext Helper manually.
8. The remaining file in that folder is the ssdt-rmne.aml file and this will be manually moved to the proper folder in the EFI drive. With the RehabMan-NullEthernet folder open, open up a new finder window (Command +N). Click the EFI drive on the left pane of the new Finder window, then navigate to EFI/ClLOVER/APCI/patched. To save time, make a copy of the file in the new folder by holding down the option key, clicking the ssdt-rmne.aml file, then dragging and dropping it in the EFI/CLOVER/APCI/patched folder. Now restart your system.
9. Only a few more steps left to go. Open System Preferences --> Network. Delete all of the entries for each network interface type you have. Sierra now handles removal of network interfaces differently than in earlier OS X versions. With every type you remove, it prompts you whether or not you want to have it re-added later. Click "no" for each prompt.
10a. For this next step you may need to enable access to root in the sidebar of the Finder window. Go to Finder (desktop), Finder (in the menu bar),and then Preferences. In the sidebar tab, ensure that your Hackintosh has the checkmark next to it under "Devices". then close the window.
10b. Now we have to navigate to a folder in the System. Double-click the name of your Sierra hard drive, then navigate to Library/Preferences/SystemConfiguration. Delete the NetworkInterfaces.plist or drag it to the trash, enter your password to confirm this, empty the trash, then reboot again.
11. When your system comes back up, go back into System preferences --> Network, then click the plus symbol to start re-adding the interfaces again. Be sure to add the Ethernet first, then any WiFi, Bluetooth, or other devices. After a few seconds you should be able to launch the App Store, sign in, then it should recognize your login and password.
