Adding a Second Hard Drive to your Laptop
Laptops usually come with both a hard drive and a DVD drive. While you can swap out the original hard drive and replace it with a blank one to test out OS X, you can replace the DVD drive with a DVD hard drive caddy and have two internal hard drives instead. This allows you to have one hard drive for Windows and another for OS X, or you can set one drive for OS X and another for storage purposes only. Some laptops from HP and others with 17" screens have bays for two hard drives in addition to the DVD drive!
If you plan on using a dual-boot system, please note that Windows is choosy in this matter. The original hard drive bay must have the Windows hard drive, but the DVD bay with the hard drive can have OS X on it. Also note that Ultrabooks (very thin laptops) may not be able to accommodate a hard drive caddy due to their thinness. When loading OS X on to your hard drive, you can remove the original hard drive from your laptop and replace it with the one reserved for OS X, or keep your existing Windows hard drive in place and put the blank one reserved for OS X in the caddy. On my Lenovo P580, the BIOS has one parameter in particular that lets me choose between the two OSes. If i choose UEFI mode, it will boot to the OS X drive (where the DVD drive used to be), or if i choose Legacy mode it will boot to the Windows drive. For safety's sake I would recommend removing the Windows drive temporarily so you don't accidentally format it.
Your typical laptop's DVD drive is a universal shape, so you need not look for a DVD hard drive caddy specific to your existing laptop model. So start by going on eBay and do a search for "DVD hard drive" minus the quotes. if you keep the quotes in your search will look for specific listings as "DVD hard drive" verbatim. Sort it by Buy It Now and "Price + Shipping: Lowest first":
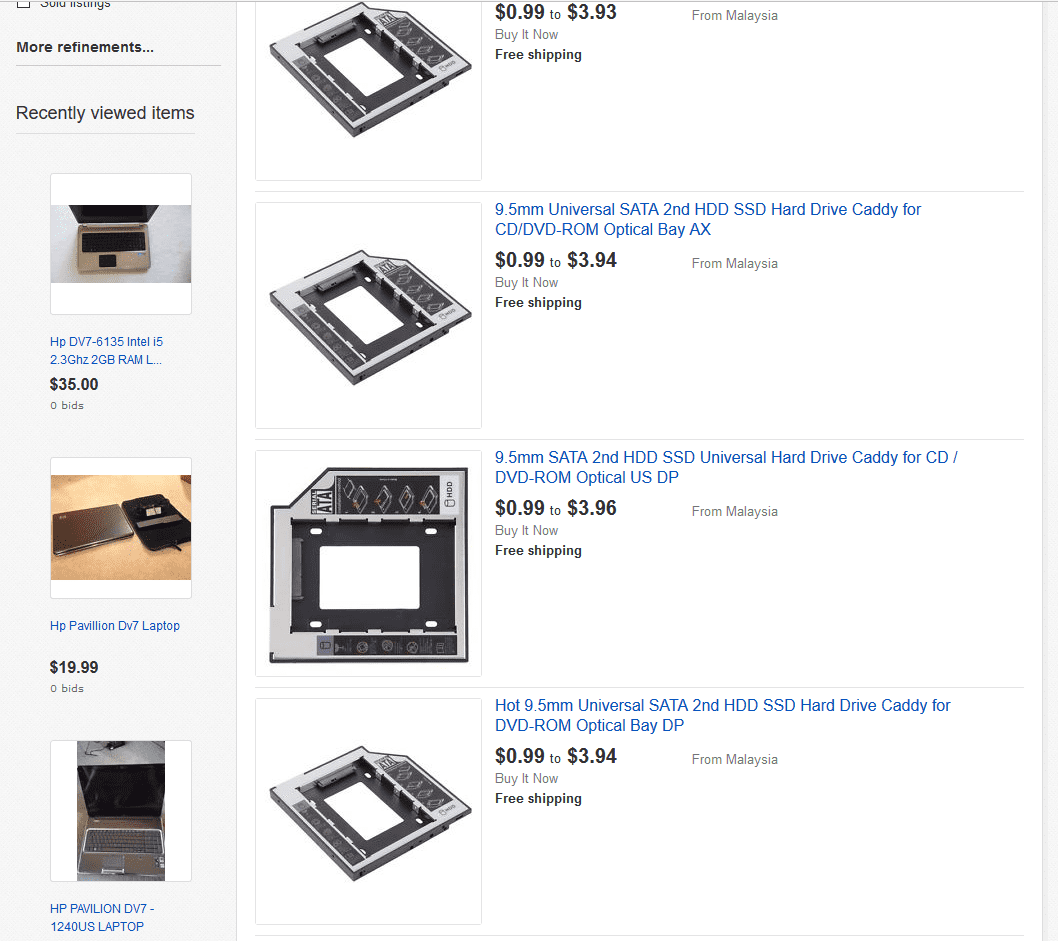
Search results show international sales, and that's where you get the cheapest prices. If you limit it to "United States" you'll see the same items go for slightly under $6. Personally I don't mind waiting on some items to arrive from China, but for others I'd rather pay a little bit more and have them arrive much faster. Overseas vendors usually have other odd adapters and items you may not find locally, but your mileage may vary.
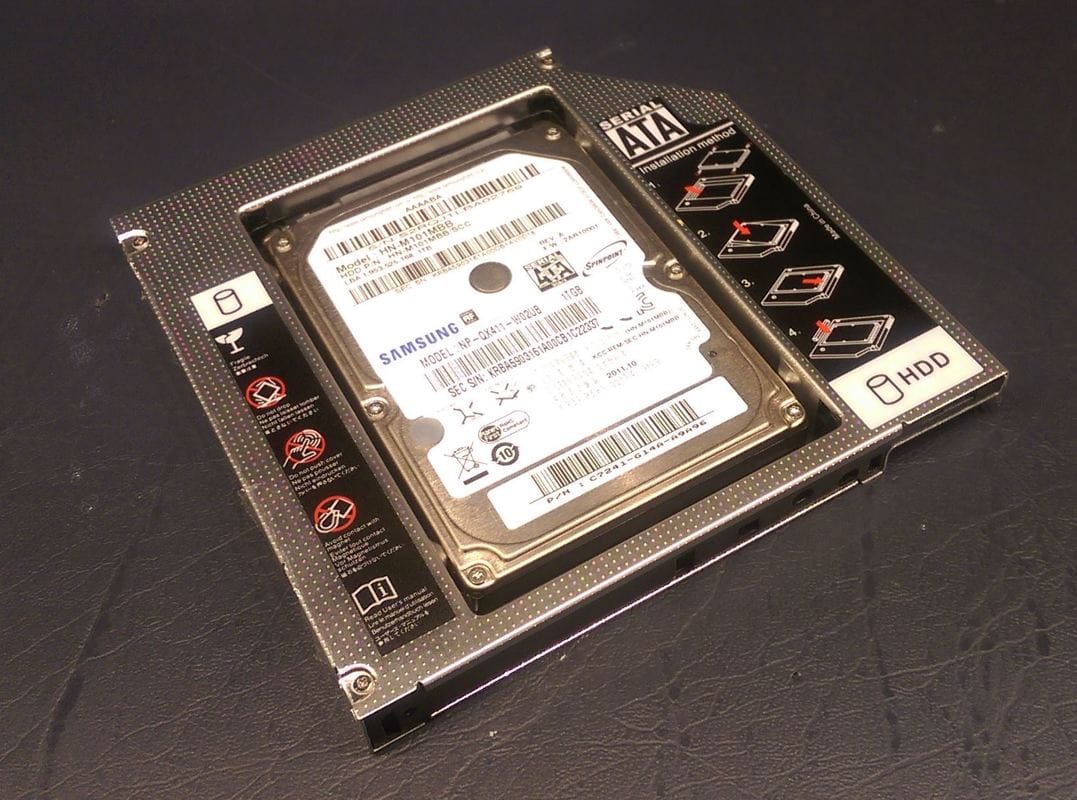
If you can spend a bit more (under $10 total), look for the DVD hard drive caddies that come in an external enclosure with a power adapter. This item will allow you to put the DVD drive removed from your laptop into the enclosure and use it as an external DVD (which is great if you need to load files you have saved on a CD or DVD which can't be found on the Internet). Once it arrives it should look similar to this:
If you can spend a bit more (under $10 total), look for the DVD hard drive caddies that come in an external enclosure with a power adapter. This item will allow you to put the DVD drive removed from your laptop into the enclosure and use it as an external DVD (which is great if you need to load files you have saved on a CD or DVD which can't be found on the Internet). Once it arrives it should look similar to this:
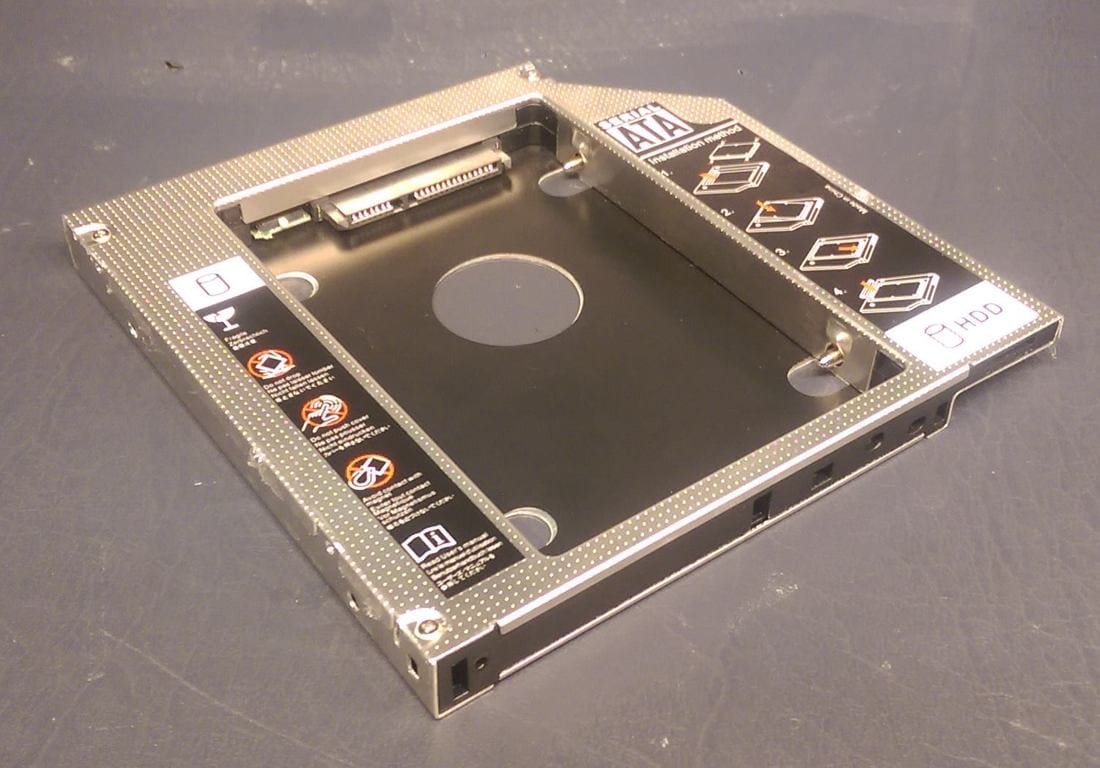
The device is the same shape and size as the DVD in your laptop but has a recessed area for a 2.5" hard drive.
If you look closely at the above photos, the recessed area in the caddy has small screws used to secure the hard drive in place once it's been inserted. Find a small philips head screwdriver to recess these screws.
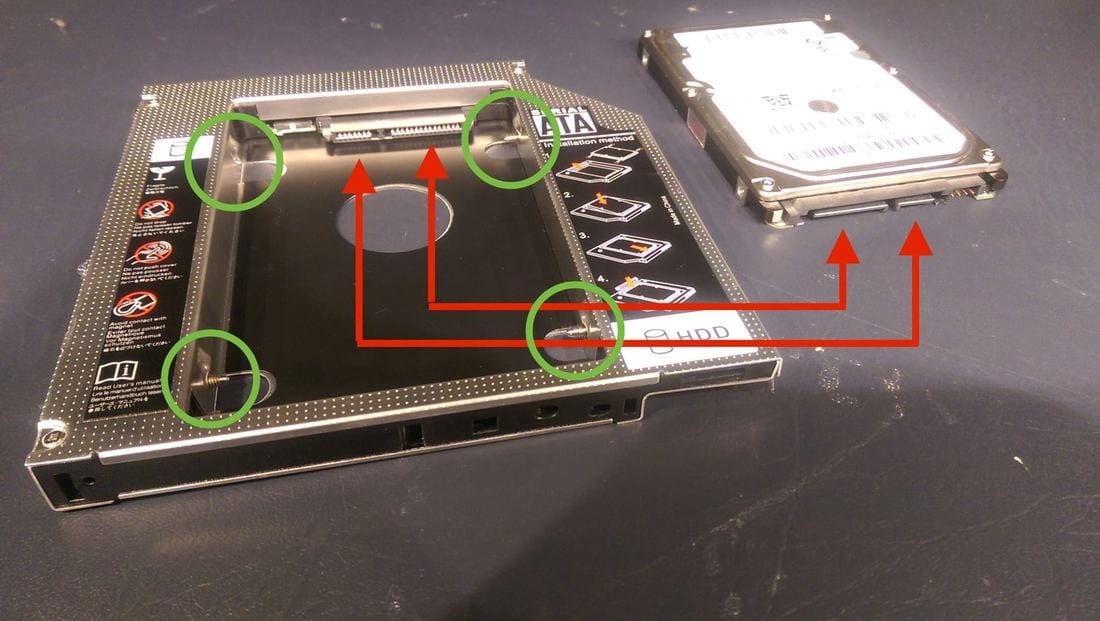
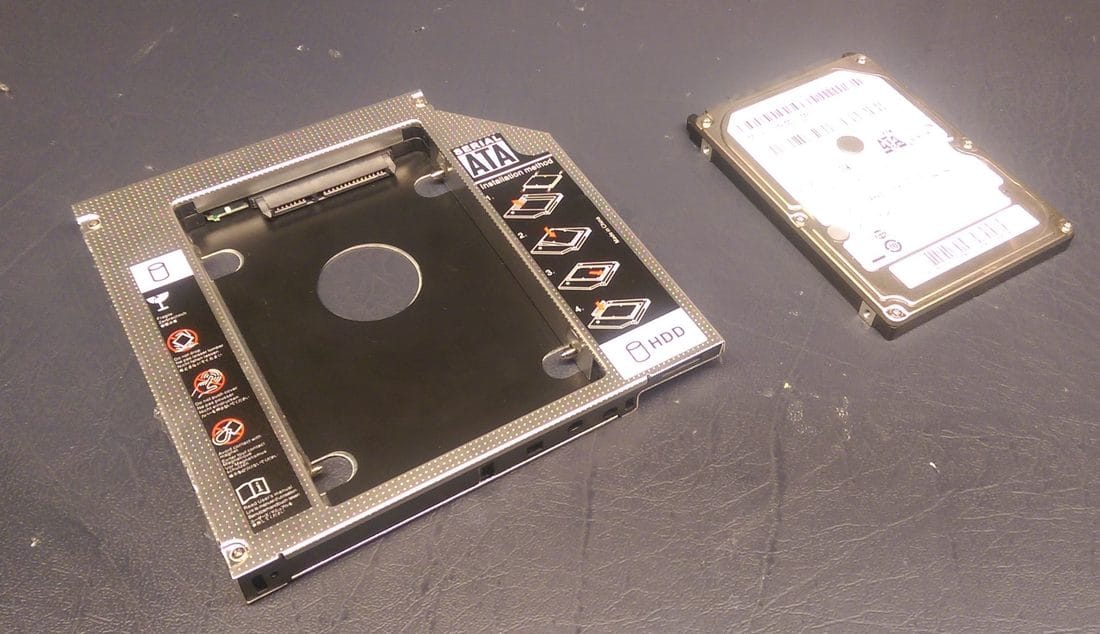
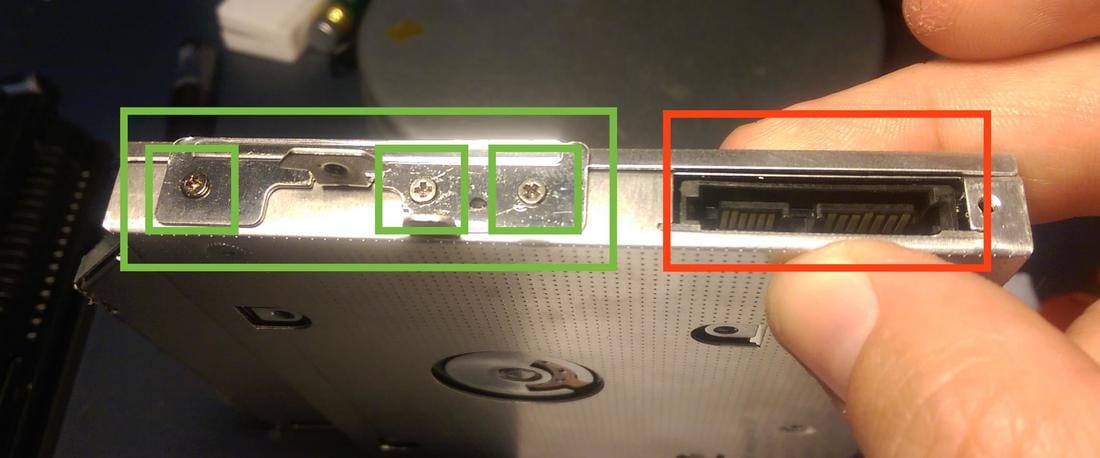
Then you can line up the drive, push it back to make contact with the power and data connectors (red arrows), then secure it in place with the small screws in the caddy:
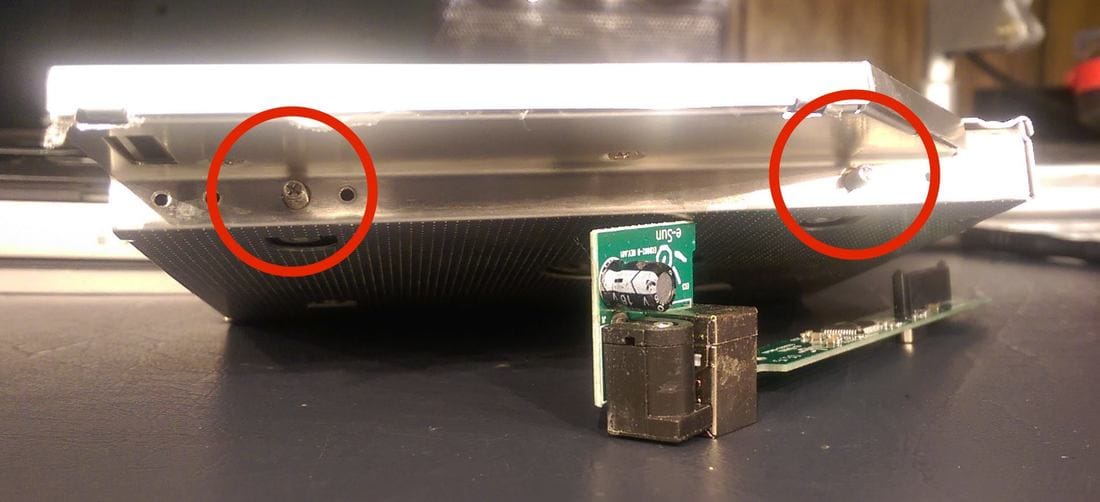
The screws to secure the drive to the caddy are VERY small, so ensure you have a bit or screwdriver small enough to tighten them. Here's a closeup of one side of the caddy:
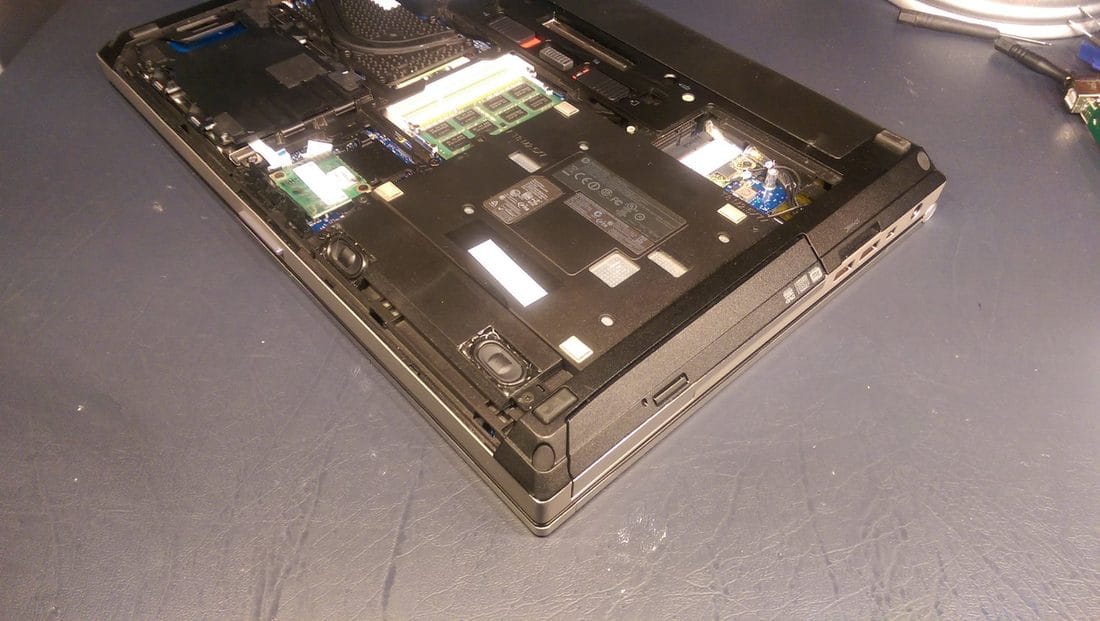
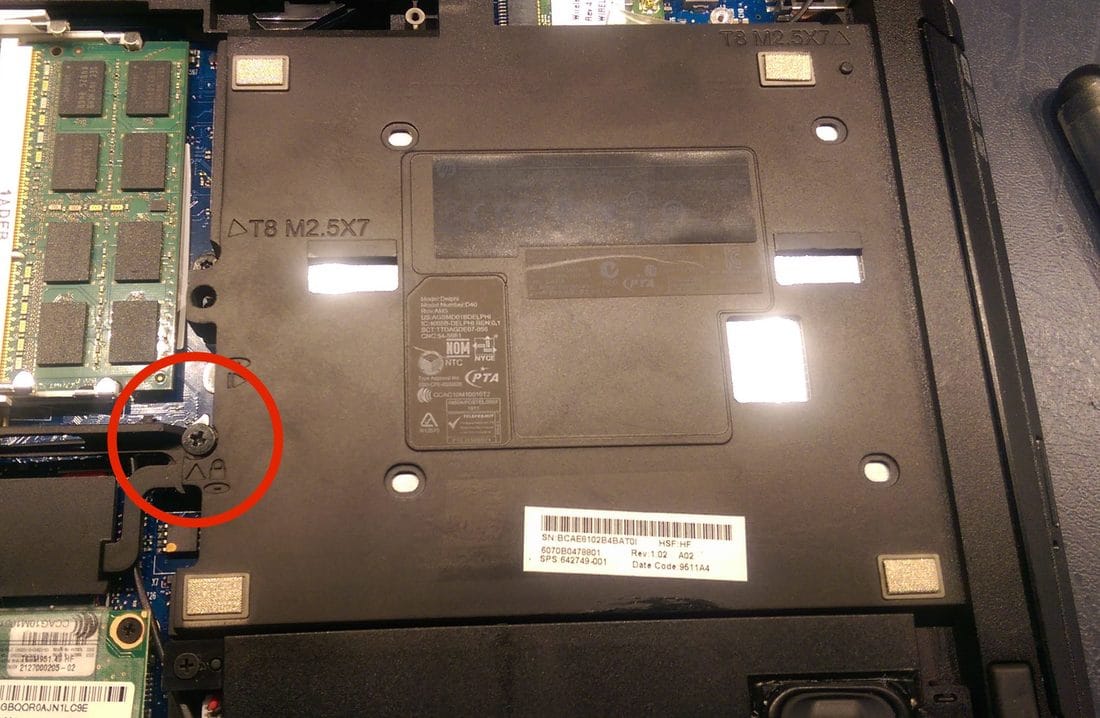
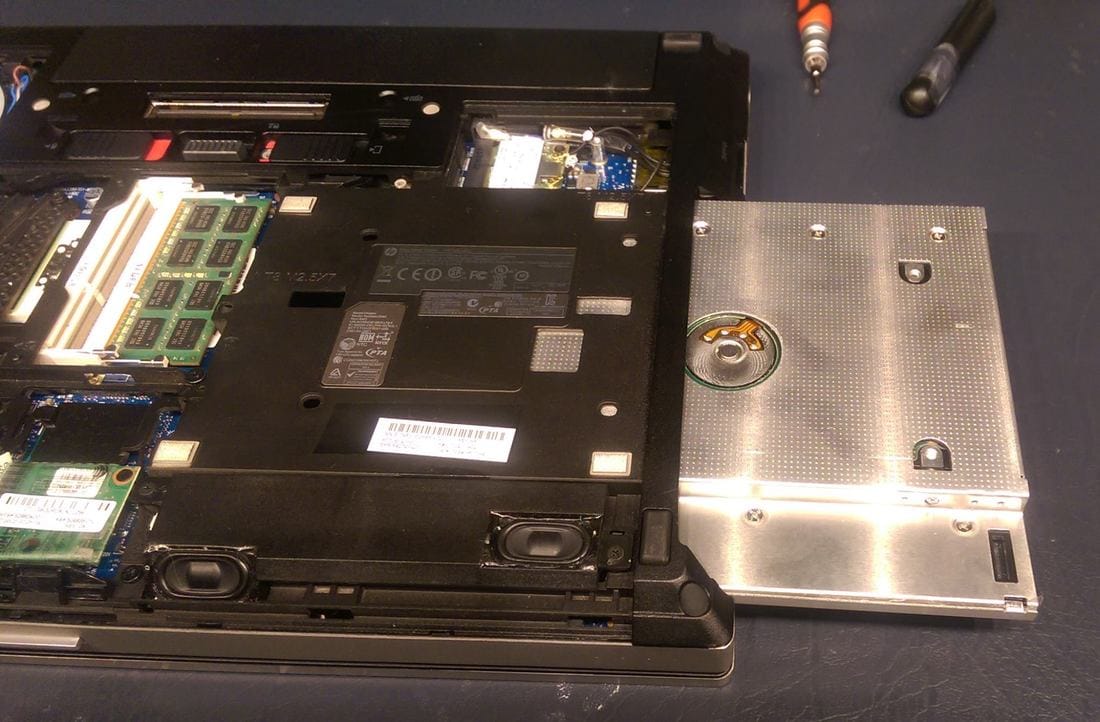
Now flip your laptop over and find the screw that secures the DVD to your laptop. The one in the photo below is from an HP Probook 4440s. Most screws wil be a philips head but you may have others with a torx head.
Remove the screw, then slide the DVD drive out of the laptop. You may need to use a flat head screwdriver to help push it out a bit:
In order to keep the caddy locked in to the laptop, you'll have to remove the small back plate or lock plate from the DVD drive using the same screwdriver or bit:
Remove it from the DVD drive, place it on the caddy, then use the screws to secure it. Because of the small size, it can be a little tricky, but having a steady hand or holding up the caddy using a vise will make it easier. When you're finished, slide it back in your laptop, secure it down with the screw, then boot into BIOS. Some laptops may have you choose between Legacy and UEFI mode, but others should let you choose the boot drive in a typical manner.
I had formatted the drive in the DVD caddy as dual boot and partitioned it into two, so one was for Windows and the other for OS X (center), The original drive was a 120GB solid State drive with OS X (top):
I had formatted the drive in the DVD caddy as dual boot and partitioned it into two, so one was for Windows and the other for OS X (center), The original drive was a 120GB solid State drive with OS X (top):
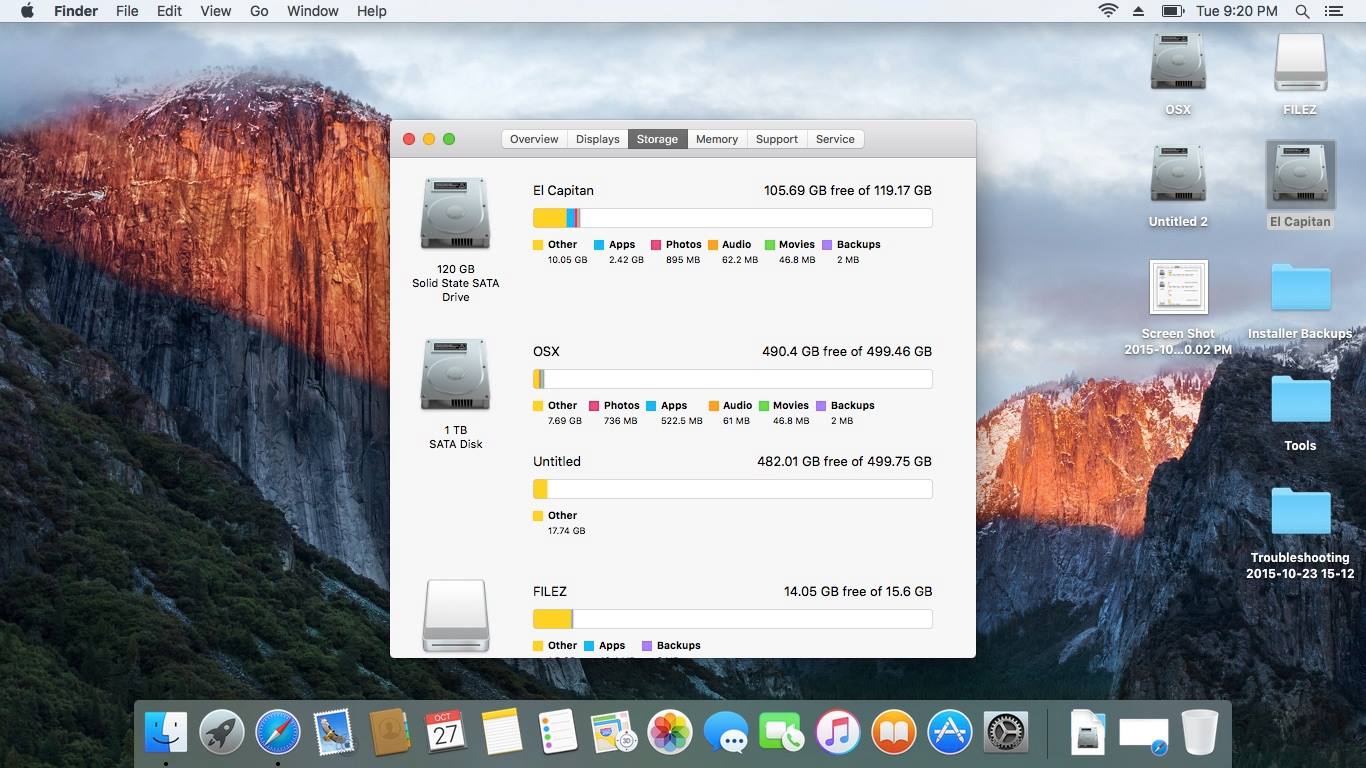
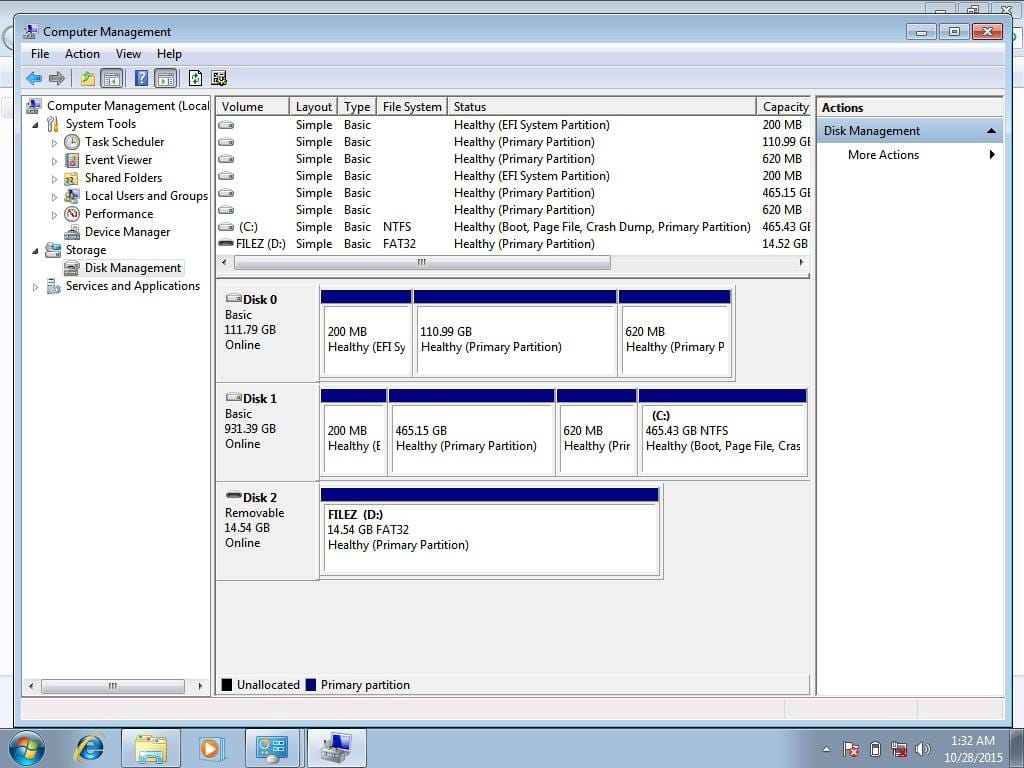
When I boot into Windows I can still see the drives (center):
The last step is for aesthetic purposes and is entirely optional. If you'd like, you can also unhinge the cover tabs of the old DVD drive and insert them into the hinges of the DVD hard drive caddy. This will allow the caddy to blend in with the ridges and curves of the laptop's chassis, just like the original DVD drive: